
The QuadMend Blender addon helps turn a dense AI-generated model into a lighter mesh with new UVs and baked textures. For an artist working between Tripo AI and Blender, that can make the handoff to refinement much more manageable.
I’m Francesco, the 3D artist behind 3DSkillUp. In this article, I use my orc test with QuadMend 0.10.6, developed by MendWorks, to show where it fits in an AI to game-ready workflow. What I appreciated most was the more orderly topology and the reduced need for cleanup afterward. That is my experience with these tests, rather than a guarantee for every model.
MendWorks provided a free copy for testing. This article contains affiliate links, and I may earn a commission if you purchase through them.
To explore the addon, visit the MendWorks store on Superhive and look for QuadMend.
What QuadMend adds to AI mesh retopology
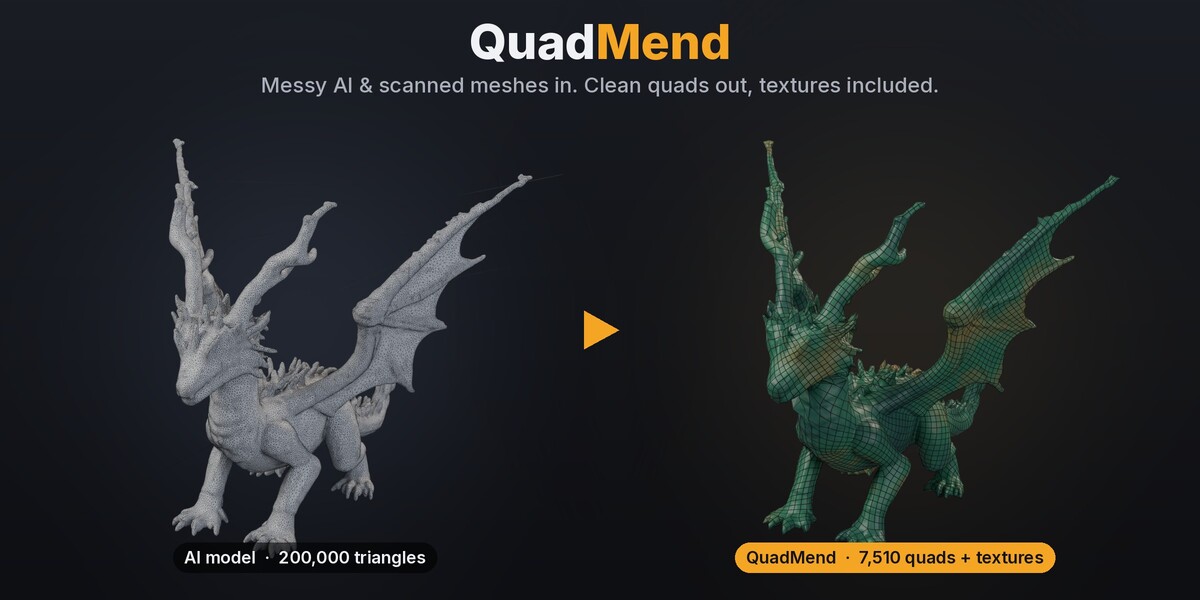
AI generation and scanning can produce a convincing surface with dense, irregular triangulation underneath. QuadMend brings mesh cleanup, quad remeshing, surface fitting, and texture baking together in one Blender workflow. Its pipeline uses QuadriFlow and Instant Meshes to turn dense source meshes into more manageable geometry, helping reduce the manual work needed before further refinement.
The aim is predominantly quad topology that is easier to inspect and edit, followed by UV generation and texture transfer. This combines several handoffs that would otherwise need separate setup. For the principles behind preserving shape while reducing geometry, see my high-poly to low-poly workflow guide.
My orc test: from dense input to a lighter textured mesh
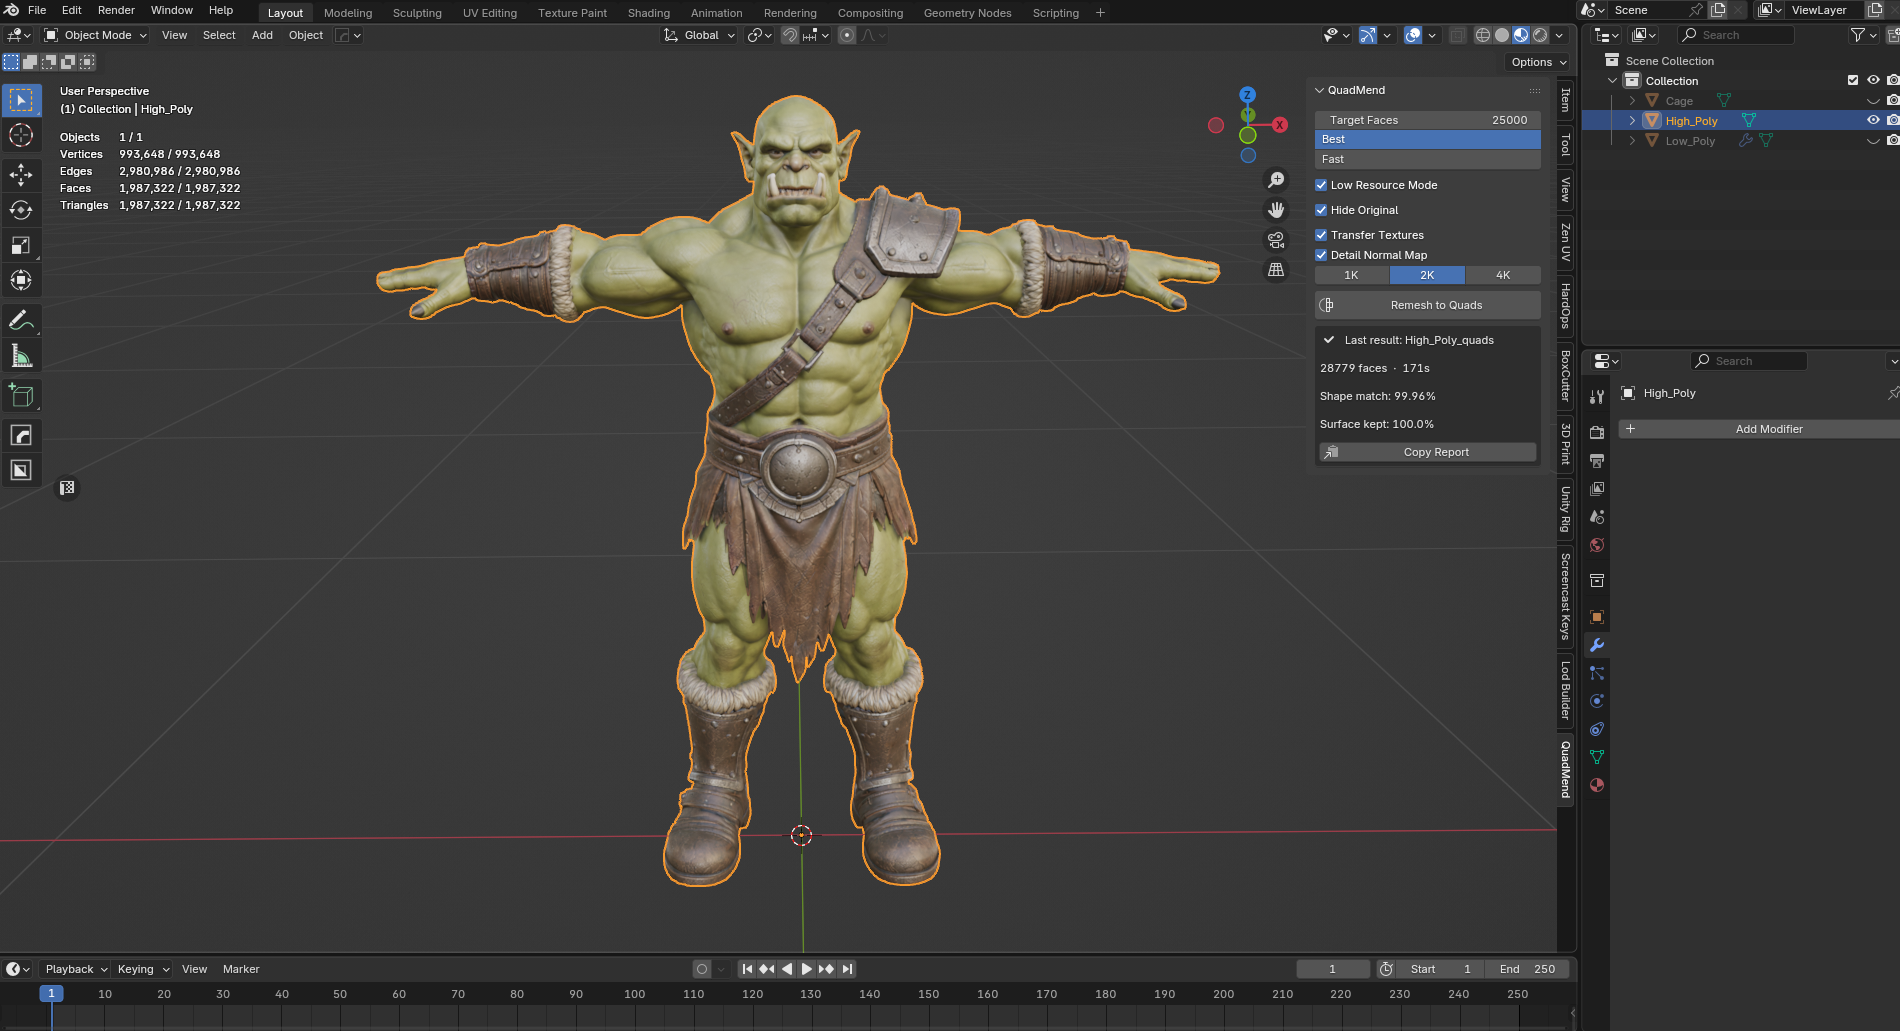
The starting point was an orc generated with Tripo AI and imported into Blender. The original viewport reports 1,987,322 triangles. The “Last result” summary visible in that first screenshot belongs to another processing run; it is not the result reported below.
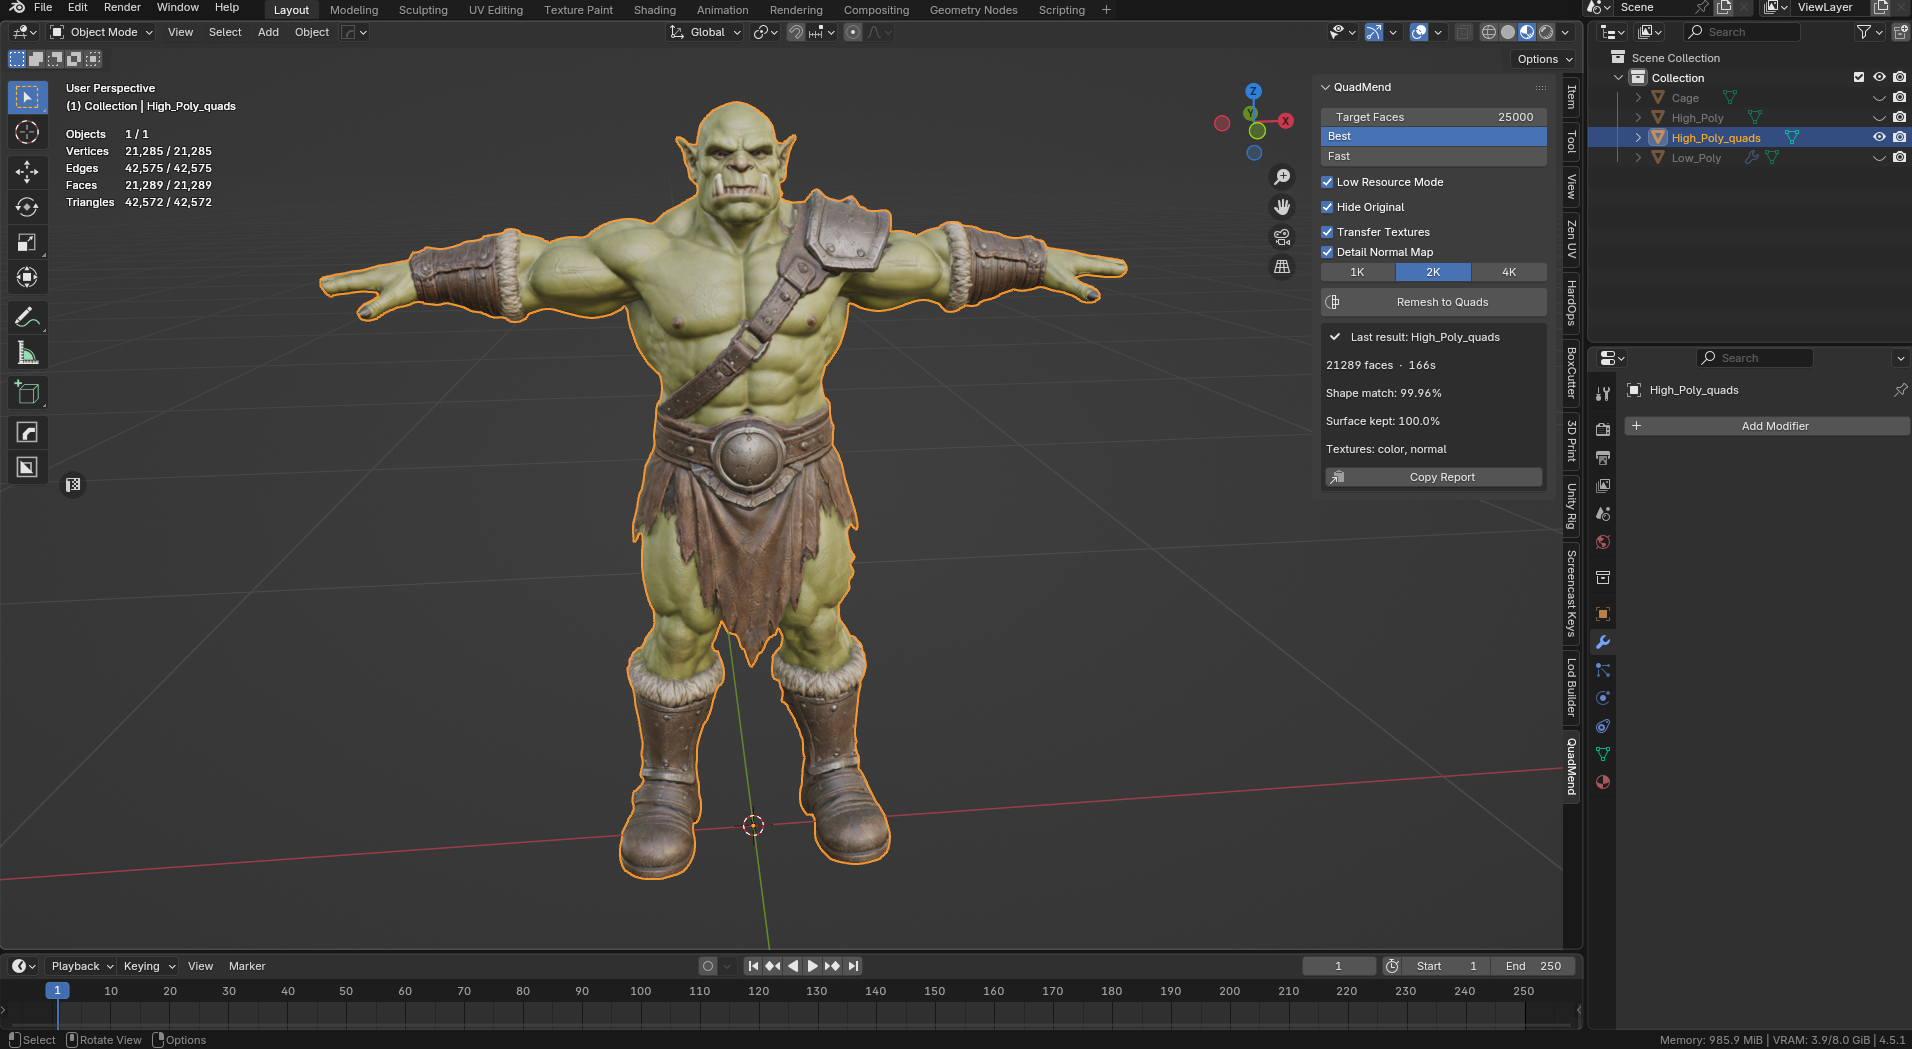
For the result shown next, Target Faces was set to 25,000. Blender reports 21,289 faces and 42,572 triangles, while the QuadMend panel reports 166 seconds. These are different measurements: faces are not automatically all quads, and a target is not an exact output count.
| Measurement | Shown in this test |
|---|---|
| Original mesh triangles | 1,987,322 |
| Target Faces setting | 25,000 |
| Result faces | 21,289 |
| Result triangles | 42,572 |
| Panel-reported processing time | 166 seconds |
That time belongs to this individual run. It does not establish how quickly another computer or model will finish.
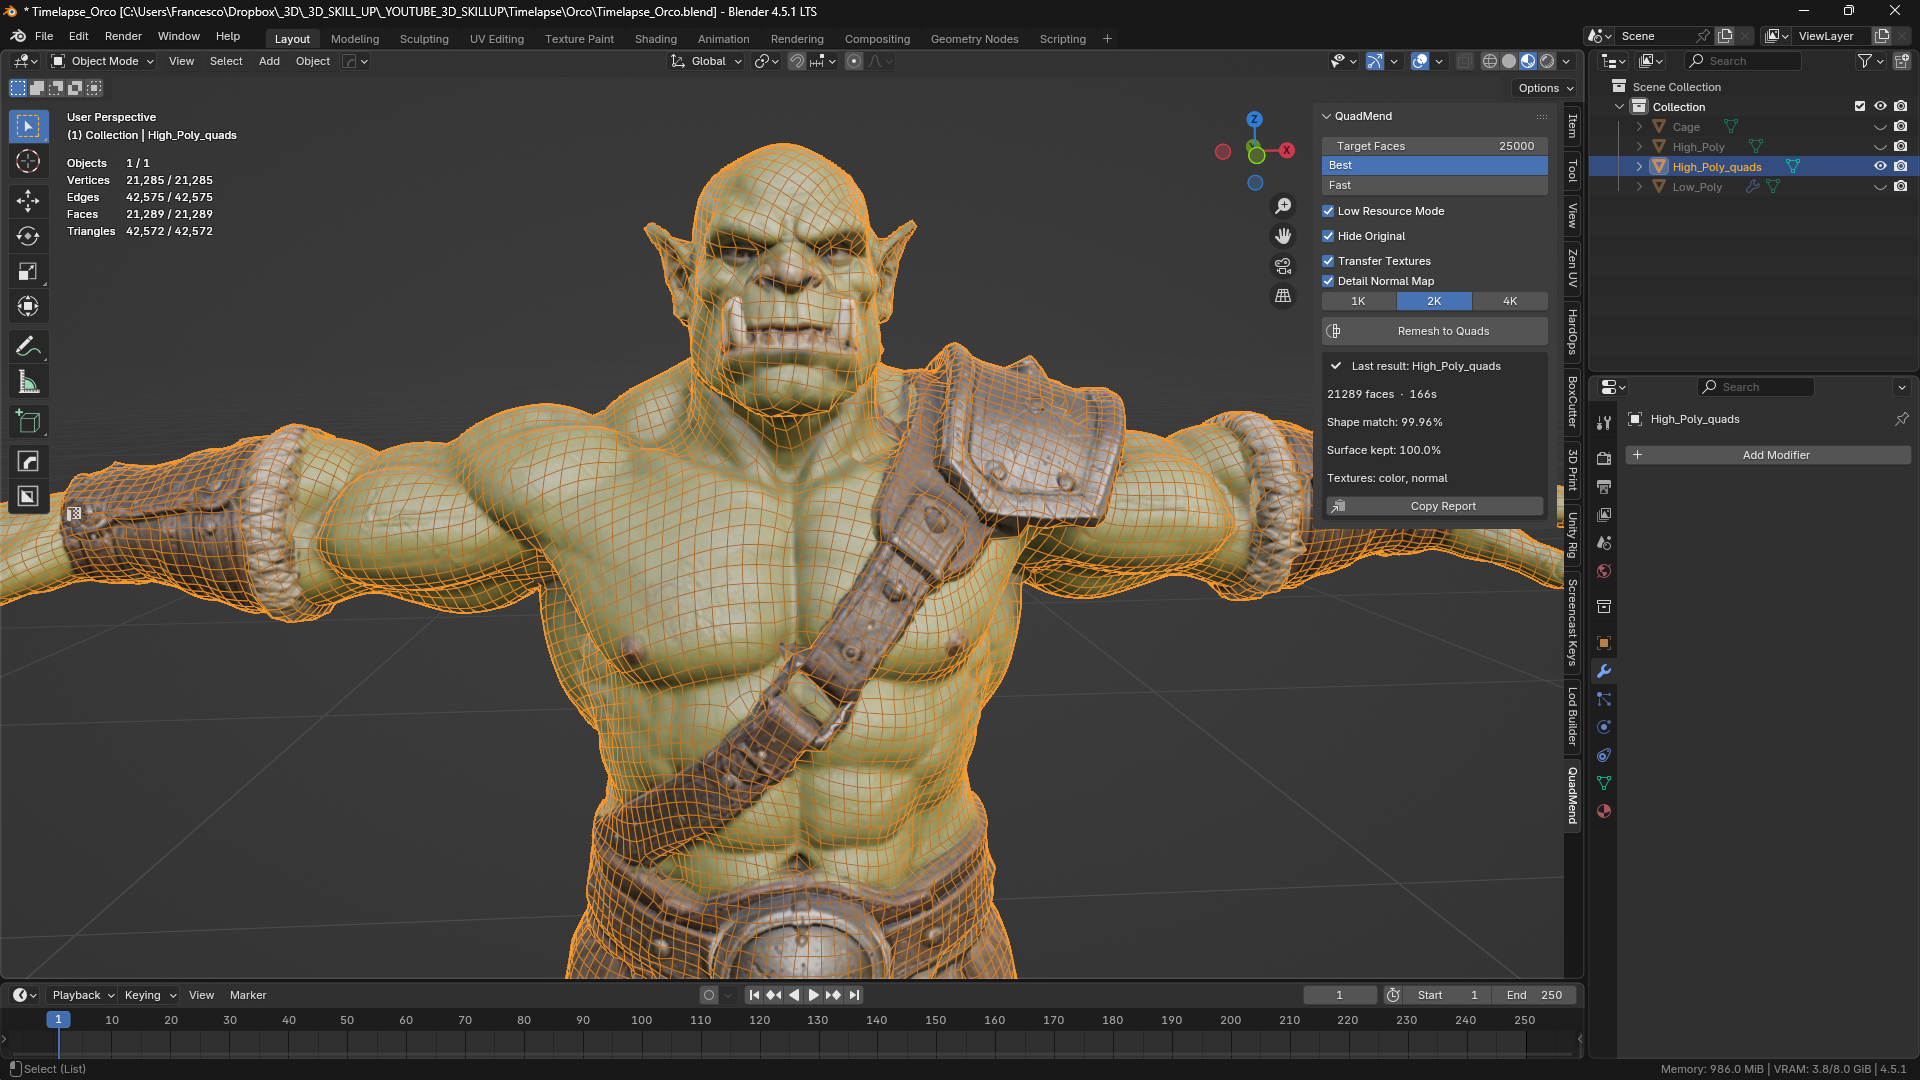
The close-up makes the result more useful to assess: the face and torso now have a readable network of edges. I found this a more practical base for editing than the dense input. I still inspect the silhouette and shading; “Shape match” and “Surface kept” are report indicators, not proof that every detail survived perfectly.
A practical Tripo AI to Blender workflow
1. Generate and import the high-poly model
Create the model in Tripo AI, then import the high-poly export into Blender with its textures. Keep a separate copy of the source. Confirm that the expected colors are visible before asking the addon to transfer them.
2. Inspect and select the mesh
Check the silhouette from several directions, look for unintended components, and select the intended mesh in Object Mode. Open the QuadMend sidebar. A quick inspection helps distinguish an existing source problem from something introduced during remeshing.
3. Choose a useful Target Faces budget
Set Target Faces according to the model’s complexity, viewing distance and intended role. A detailed character and a distant prop need different allocations. Use the orc’s 25,000 setting as a record of this test, not a universal recommendation. Increase the budget when an important contour loses too much shape.
4. Select Best or Fast
Best evaluates both remeshing engines; Fast uses QuadriFlow. If resources are limited, enable Low Resource Mode. In 0.10.6, it lowers processing priority and runs one remeshing engine at a time. Choose it for resource management, rather than assuming it makes the job faster.
5. Enable texture and detail transfer
Turn on Transfer Textures and Detail Normal Map. The supplied result screenshot also shows the 2K map setting selected. Choose texture resolution for the intended use, then judge the baked output at a realistic viewing distance.
6. Run the remesh and inspect the result
Start Remesh to Quads. Version 0.10.6 includes an in-panel indicator showing the current phase, percentage and elapsed time. After completion, compare the textured result and its wireframe against the source. Check narrow features and transitions, rather than judging only the overall face count.
7. Continue with refinement and export checks
Review topology, UVs and materials before rigging or export. My Tripo AI, Blender and Unity character workflow illustrates those later stages using a different pirate character. QuadMend can replace part of the preparation stage; the remaining production checks still matter.
How automatic texture baking preserves appearance
Remeshing changes the geometry and its texture coordinates. QuadMend generates UVs and bakes information from the source onto the new layout, helping the lighter model retain its recognizable appearance.
Base Color transfers the surface color
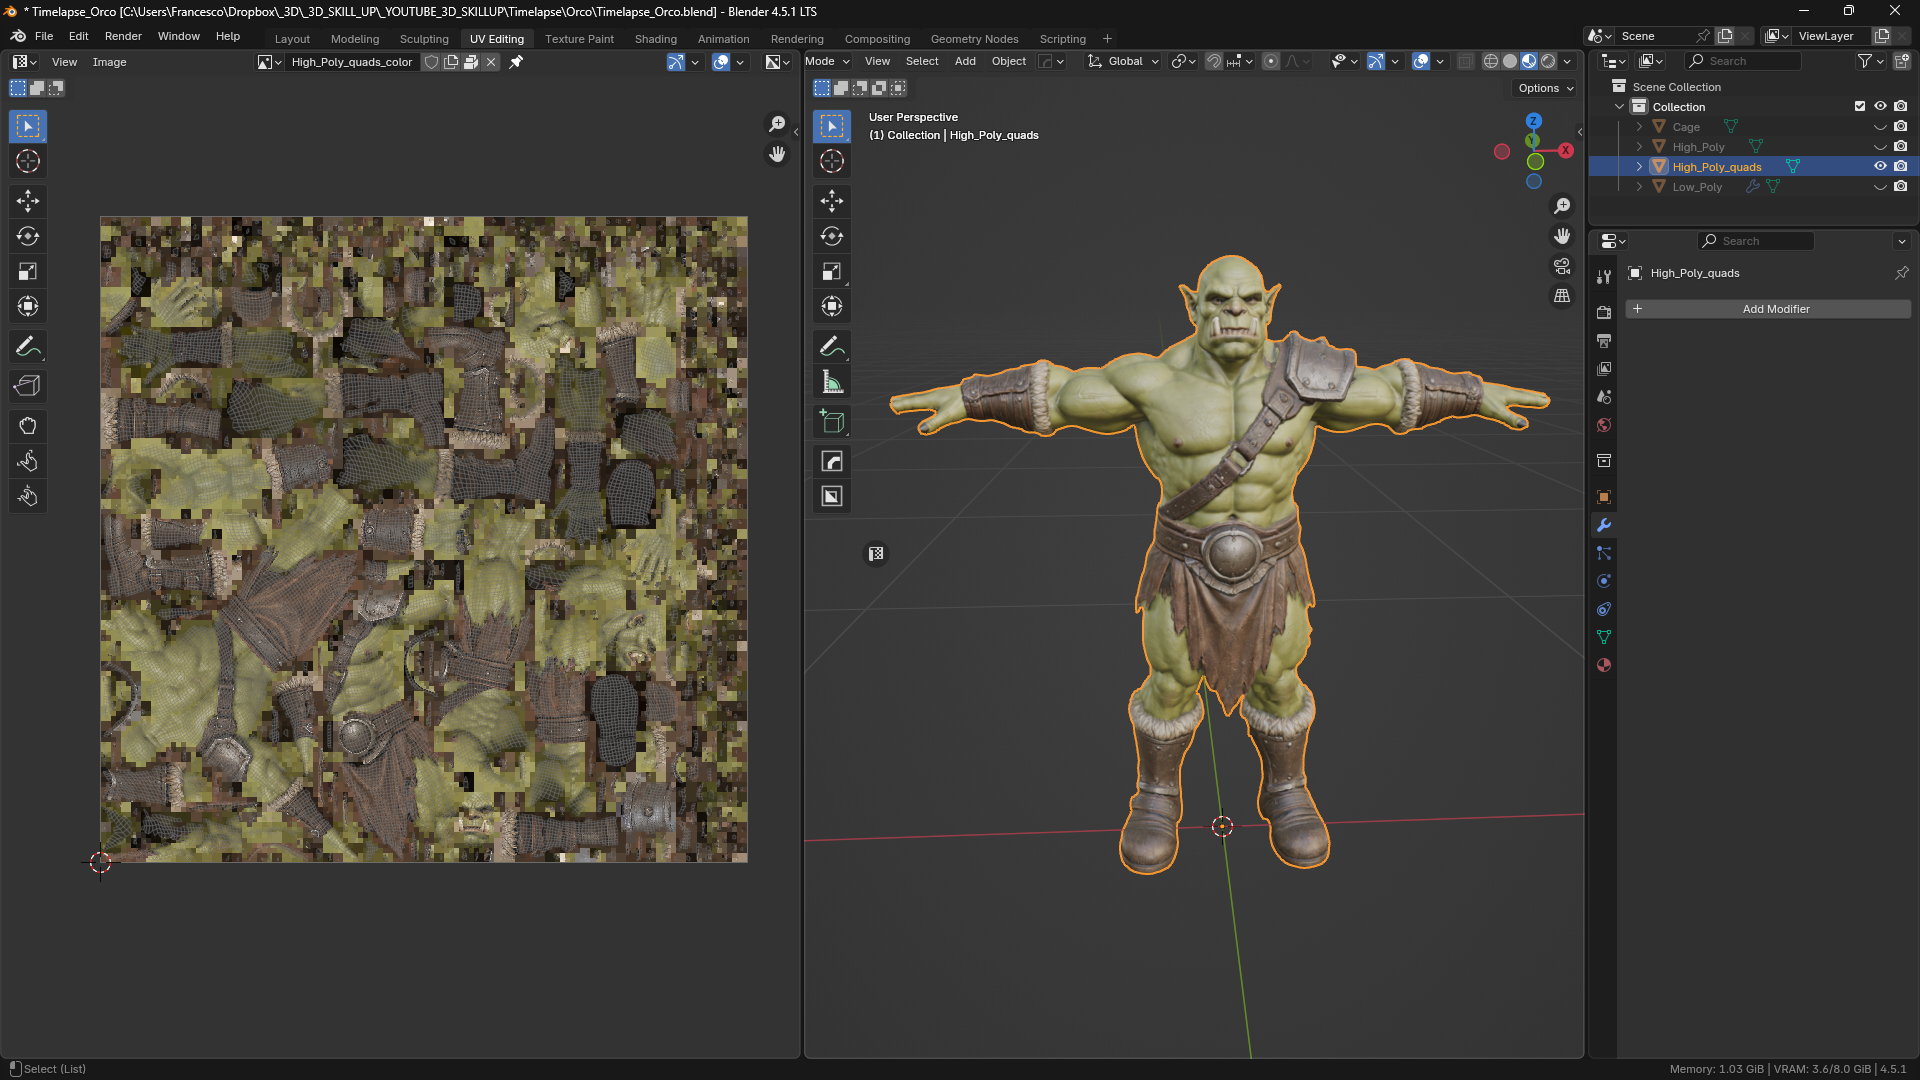
The Base Color bake carries the source’s color information onto the remeshed asset. In the orc example, the UV image contains the colors of the skin, clothing and equipment. Inspect seams and small islands at the intended texture size. A transferred color map is a useful starting point for further material work.
The normal map carries surface detail
The normal map changes how lighting responds to the surface, preserving the appearance of many smaller details without keeping all their geometry. It cannot restore a missing silhouette or replace geometry needed for deformation. Check it under changing light, not only in one flattering view.
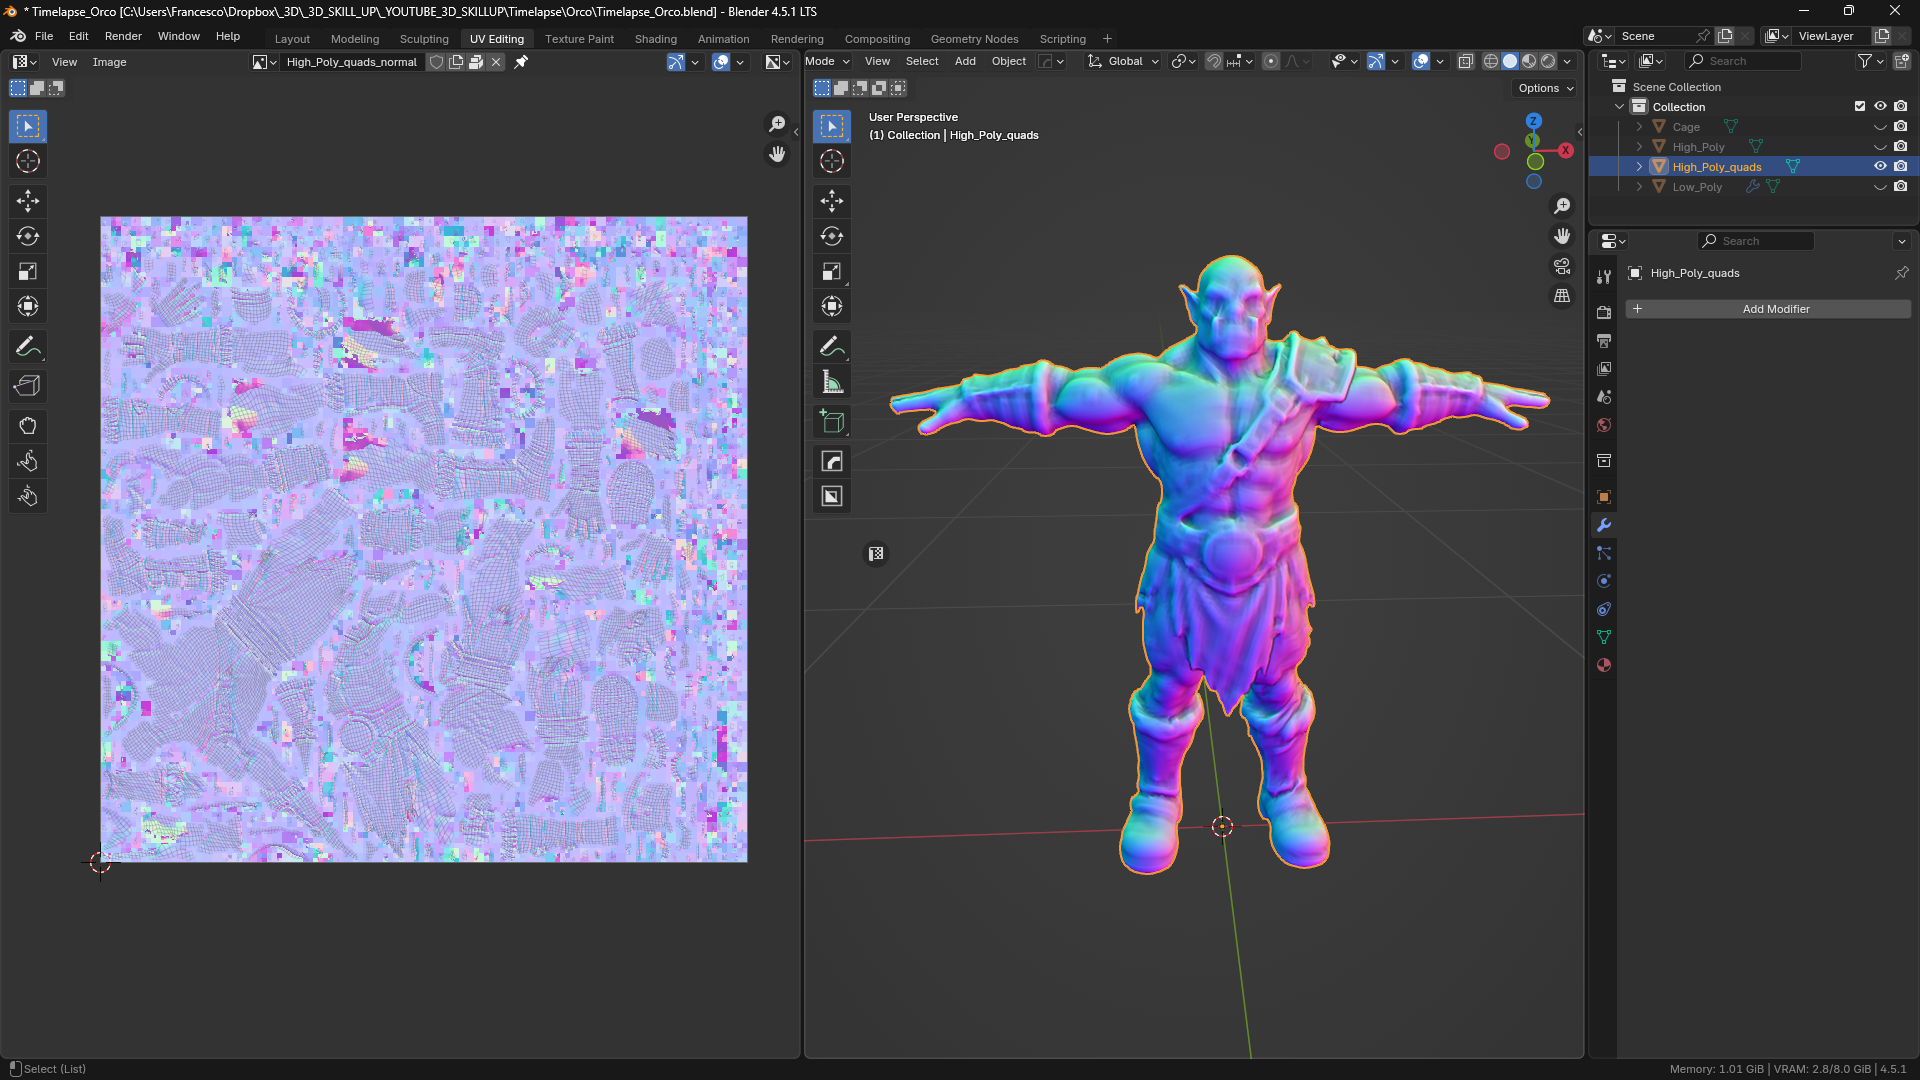
When moving the asset between tools, use the normal-map troubleshooting guide to check color space, tangent-space consistency and triangulation if the shading changes.
Set realistic expectations for automatic remeshing
MendWorks explains that thin spikes, claws and fine lettering can become rounded when the face budget cannot support them. The normal map may recover much of their appearance, and the panel indicates when a higher face count could help. Characters needing specific deformation loops should treat the output as a clean base to refine.
On its official QuadMend product page, the developer estimates about 1.5 minutes on a desktop and 4 minutes on an everyday laptop for a 200,000-triangle model, textures included. Those are developer estimates, separate from my orc run; processing times vary with hardware, geometry and settings.
Turn the remesh into a production asset
A lighter mesh is a step toward game ready. Final suitability depends on UV quality, materials, triangle budget, deformation and the destination. Test shoulders, elbows and facial movement if the character will animate. Inspect the exported mesh in the target engine, where triangulation and material settings affect the final result.
Use the game-ready model checklist before delivery. For me, QuadMend’s value is getting to those decisions with a more manageable mesh and transferred textures already in place.
QuadMend questions artists often ask
Is QuadMend an AI model generator?
No. It processes existing meshes, including AI-generated models and scans. Its remeshing pipeline uses QuadriFlow and Instant Meshes; generation happens earlier in this workflow.
Does Target Faces guarantee an exact quad count?
No. It is a target for the remeshing process. Inspect the actual result and its triangle count. My screenshot reports 21,289 faces, not a verified count of 21,289 quads.
Can I skip manual retopology for an animated character?
That depends on the animation requirements. Automatic Blender quad remeshing can provide a useful base, but deformation loops still need inspection and may need editing before skinning.
What do Transfer Textures and Detail Normal Map contribute?
In this test, Base Color transfers surface color and the normal map carries the appearance of geometric detail. Neither removes the need to review the generated UVs and materials.
Should I always enable Low Resource Mode?
Use it when you want lower processing priority and one remeshing engine running at a time. Evaluate it on your own workload; it is not a promise of a shorter processing time.
Where I would use QuadMend next
I see QuadMend as a useful bridge between dense generation and deliberate asset finishing, and I’m interested in how future versions develop. If that fits your workflow, browse the MendWorks store on Superhive for QuadMend and its current product information.