
My workflow for this game-ready pirate character starts with four reference views and Tripo AI, then continues through Blender, Marmoset Toolbag, Substance 3D Painter, Rigify and Unity. AI provides the high-poly starting point and initial retopology. Manual work turns those outputs into a textured, rigged character with a Unity Humanoid Avatar.
I recorded the full creation process as a timelapse. This article explains the purpose of each stage, including the separate Base Color bake in Blender and texture-baking stage in Marmoset. Alongside my production sequence, I have included practical checks you can use on your own character.
The complete pirate character pipeline
The handoffs matter as much as the individual tools. The high poly supplies surface information; the low poly carries the UVs, skin weights and final in-engine shape.
| Stage | Tool | Output or purpose |
|---|---|---|
| Four reference views | Reference preparation | Front, right, left and back views of one consistent character |
| High-poly generation | Tripo AI | High-poly FBX preserved as the detail source |
| Initial retopology | Tripo AI | Separate low-poly FBX for refinement |
| Mesh cleanup and UVs | Blender | Corrected low poly and usable texture coordinates |
| Cage and Base Color transfer | Blender | Color projected onto the low-poly UV layout |
| Texture baking | Marmoset Toolbag | Surface information transferred from high to low |
| Material authoring | Substance 3D Painter | Finished character textures |
| Rigging | Blender and Rigify | Skinned character and a rig for animation work |
| Engine validation | Unity | Humanoid bone mapping and Avatar configuration |
For the broader planning principles behind these handoffs, see my game asset production pipeline. Here, the focus is the specific path from an AI-generated pirate to a usable humanoid character.
1. Prepare front, right, left and back references for Tripo AI
I begin with front view, right view, left view and back view references. Together, they describe the same pirate from different angles: the proportions, clothing silhouette, headband, vest and boots should agree across all four images.
The front view establishes the main design. The two side views explain depth, including the profile of the head, torso and footwear. The back view provides information that the front cannot show, such as the rear clothing silhouette and the continuation of straps or garment edges.
When preparing a similar set, keep the pose, apparent character height, framing and lighting as consistent as possible. Show the complete body, keep hands readable and avoid accessories appearing on different sides between views. Follow the orientation labels in the tool; do not accidentally mirror a side reference or assume that your upload order defines its direction.
These are multiple views of one design, not four separate character concepts. Conflicting clothing or proportions force the reconstruction to reconcile incompatible information. Tripo documents directional inputs in its multiview generation reference; the exact interface can vary, so check the labels in the version you use.
2. Generate the high poly in Tripo AI and save an FBX
I use the references to create the initial high-poly character in Tripo AI, then save that result as a high-poly FBX. This preserves the dense source separately from the mesh that will eventually be rigged and imported into Unity.
At this stage, the useful question is whether the generated shape expresses the intended character. Inspect the silhouette from several angles, especially fingers, clothing openings, overlapping garments and small accessories. A convincing front render can conceal awkward side or back geometry.
Keep the high-poly export and its texture files together. An FBX export alone does not guarantee that every image needed by its materials will be available after import. The color-transfer stage depends on Blender being able to evaluate the source material correctly.
3. Retopologize in Tripo AI and save a separate low-poly FBX
Next, I generate the initial retopology with Tripo AI and export a low-poly FBX. This is the working mesh for the next stages; I retain the high poly as the baking source.
Reducing density is only part of preparing a character. The lower-resolution mesh must preserve the visible shape and provide geometry that can bend around shoulders, elbows, hips, knees and fingers. Automatic retopology gives me a starting point that I then inspect and refine manually.
For your own files, use distinct names such as pirate_high.fbx and pirate_low.fbx, and keep revisions rather than overwriting the only source. My high-poly to low-poly workflow guide explains how silhouette, surface detail and deformation requirements affect this separation.
4. Import both meshes and clean the low poly in Blender
I import the high-poly and low-poly FBX files into Blender. Working with both versions makes it possible to compare the refined low poly against the source before baking.
First, check that their position, orientation and scale match. Organize them so the high poly can be hidden during editing and restored for comparison. Avoid moving or scaling only one mesh after alignment: projection relies on corresponding surfaces occupying the same space.
My manual stage is fixing and cleaning the topology. Useful inspection targets include duplicate or disconnected geometry, unintended holes, inverted faces, intersections and areas where the generated mesh poorly follows the original form. Treat each problem locally; indiscriminate merging or deletion can damage clothing boundaries and intended openings.
For a humanoid, pay particular attention to joint regions. A tidy-looking wireframe is not enough if the shoulder collapses when the arm lowers. Preserve geometry where it supports silhouette or bending, and simplify regions that do not need the same density. My guide to clean topology and its practical purpose goes into that distinction.
Complete major topology changes before the final UV layout, cage and bake. Changes later in the sequence can require rebuilding those downstream outputs.
5. UV unwrap the corrected character in Blender
After cleanup, I unwrap the low-poly character in Blender. These UVs are the destination for the projected Base Color and the texture maps used during painting.
For a comparable character, place seams where they make the surface easier to flatten while limiting visible disruption. Clothing boundaries can provide useful seam locations, but inspect the actual distortion rather than assuming a hidden seam guarantees a good unwrap. A checker texture helps reveal stretching around curved sleeves, the head and boots.
Allocate texture space according to what needs to remain readable at the intended camera distance. Leave suitable island padding for the bake and lower mip levels. Avoid unplanned overlapping islands when you need unique detail on different parts of the character.
If a feature becomes stretched or blurry despite sufficient image resolution, diagnose the UV layout first. See UV stretching in Blender: causes and solutions for a focused troubleshooting workflow.
6. Duplicate the low poly to create a baking cage
I create the cage by duplicating the corrected low-poly mesh. The duplicate becomes a projection envelope around the character, while the original low poly remains the bake target.
A cage controls where projection rays start and how they reach the high-poly surface. It needs to cover the relevant source detail without reaching unnecessarily far into neighboring parts. Simply enlarging the entire character with a uniform scale is unreliable around armpits, fingers and other narrow gaps.
Adjust the duplicated surface outward and refine problem areas locally. Preserve the cage’s correspondence with the low poly: keep the same topology and face order, and do not add or delete geometry on just one of the two objects. Inspect whether nearby parts could project onto one another before committing to the bake.
7. Bake the Base Color in Blender
In this workflow, I bake the Base Color in Blender before continuing with texture baking in Marmoset Toolbag. The purpose is to transfer the high-poly source color onto the corrected low-poly UVs.
A practical setup for diffuse source color in Cycles is:
- Confirm that the high-poly material displays its source textures correctly.
- Create the destination image and select its Image Texture node in each relevant low-poly material.
- Select the high-poly source, then make the low-poly target the active selection.
- Enable Selected to Active, enable the cage and assign the cage object.
- Use a Diffuse bake with Color enabled and Direct and Indirect lighting disabled.
- Check the baked image on the low poly and save it explicitly to disk.
This transfers diffuse material color without adding scene-light contributions. For a source material whose color is stored in a different shader path, route that intended color appropriately before baking. Lighting already painted into a source image will still be present; disabling lighting contributions does not remove it.
The Blender baking manual explains active targets, cage correspondence and bake passes. If you encounter blank areas or wrong-surface projection, use my Blender baking troubleshooting guide before increasing texture resolution.
8. Bake surface detail in Marmoset Toolbag
I then use Marmoset Toolbag for texture baking, with the high poly as the source and the UV-mapped low poly as the destination. This is a separate task from the Base Color transfer in Blender.
For your own bake, assign corresponding meshes to the correct high/low groups and inspect projection in Toolbag. Its cage and projection controls need their own review; a successful Blender bake does not prove that a different baker is configured correctly. Keep nearby clothing layers and body parts from projecting unwanted detail onto each other.
Start with a quick test and inspect seams, contact areas and distorted details before producing final outputs. Toolbag’s offset and skew controls can help correct projection problems; the official Marmoset baking tutorial explains how those controls work.
Normal maps, ambient occlusion and curvature are examples of useful baking outputs, depending on the material workflow. Keep the normal-map convention, mesh shading and triangulation consistent through export. My normal-map mistakes guide helps distinguish projection errors from shading or tangent-space mismatches.
9. Texture the pirate in Substance 3D Painter
With the mesh and baked information prepared, I move to Adobe Substance 3D Painter to develop the finished character textures. This is where the pirate’s fabric, leather, skin and metal details become distinct surfaces.
When following this workflow, import the cleaned low poly, bring the Blender color bake in as a texture resource, and assign compatible baked mesh maps to the appropriate Texture Set Settings slots. Base Color artwork and mesh maps have different jobs: the former supplies color, while maps such as curvature and ambient occlusion can guide masks and generators. Adobe’s Painter glossary explains these mesh-map roles.
Treat the transferred color as a starting layer that can be corrected and extended. Separate materials deliberately, then build variation appropriate to each surface. Fabric, worn leather and exposed metal should respond differently under the same light; adding the same noise and edge wear everywhere weakens those differences.
Judge material response under more than one lighting setup. My roughness-map guide explains why believable reflection width and variation matter as much as color. Export with a preset appropriate to the intended Unity shader and render pipeline, then check channel packing and normal-map interpretation in the engine.
10. Rig the character with Rigify in Blender
After texturing, I rig the character with Rigify. The central handoff is from a static textured mesh to a skinned character that can be posed and evaluated through a skeleton.
The general Rigify sequence is to fit a metarig to the character, generate the animation rig and bind the mesh to that generated rig. The metarig is the generation template; it is not interchangeable with the final animation rig. Blender’s Rigify basic usage documentation describes that relationship.
Binding is the beginning of deformation review. Test the shoulders, elbows, knees and hips, then inspect fingers and clothing intersections. Automatic weights can provide an initial result, but corrective weight painting may be needed wherever neighboring parts move incorrectly.
Keep the Blender control rig available for animation work and prepare a suitable deforming skeleton for the game-engine export. Exporting the metarig or every control object is not a substitute for exporting the intended skinned hierarchy. My Blender FBX export troubleshooting guide covers common scale, orientation and transfer problems.
11. Configure the Unity Humanoid Avatar
The final stage is importing the rigged character into Unity and configuring it as Humanoid. The engine needs a valid mapping between the imported skeleton and the humanoid body structure.
To check this handoff, select the character FBX, open the Rig tab and set Animation Type to Humanoid. Use Create From This Model for this character’s Avatar, apply the settings and open Configure. Review the required bone assignments, correct any missing or incorrect mappings, and verify the reference T-pose before saving the configuration. Unity’s Humanoid import documentation details this process.
A valid Avatar confirms the mapping; it does not automatically certify skin weights, cloth intersections or material quality. For your own validation, use a compatible animation clip and inspect movement, scale and foot contact in a test scene. The broader Unity model import guide covers materials and scene integration beyond the Avatar settings.
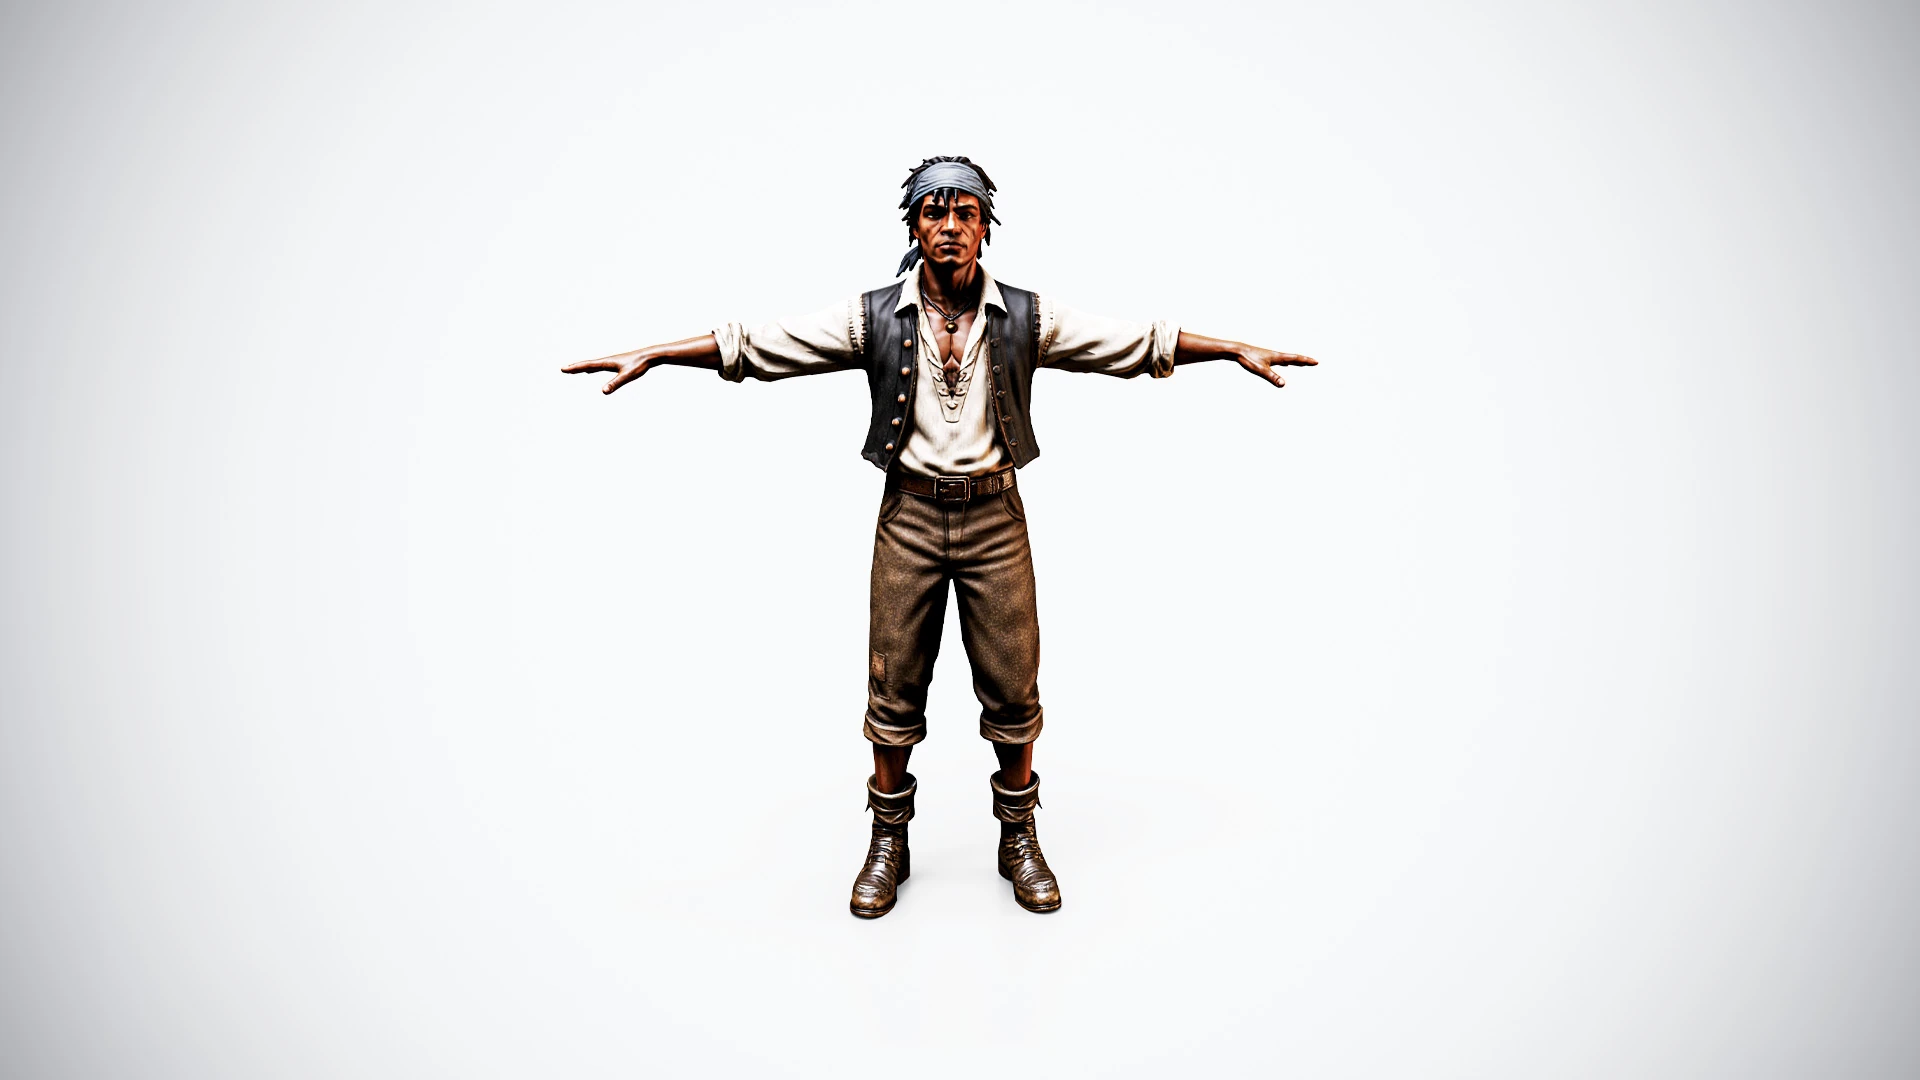
The finished rigged pirate character
The result is a textured, rigged pirate character prepared for a real-time engine. If you want to use the finished asset, the Rigged Pirate Crewman game-ready 3D model is available on Superhive.
The listing includes a Rigify source setup, a separate simplified humanoid rig and a rigged FBX tested with Unity Humanoid. Animation clips and facial rigging are not included. Check the product page for the current package contents and license.
For another project, use my game-ready model checklist to evaluate the final delivery. This pirate workflow shows why AI generation, retopology, UVs, baking, texturing, rigging and engine checks all contribute to the result. Each stage solves a different production problem.
Watch the complete character creation timelapse
The video below follows the creation process from Tripo AI to Unity. It has no commentary and no audio. Use these chapter links to revisit a particular stage; the written guide above adds the explanation behind the operations.
| Time | Chapter |
|---|---|
| 00:15 | High Poly Character Creation with Tripo AI |
| 00:42 | AI Retopology with Tripo AI |
| 00:55 | Importing the Character into Blender |
| 01:04 | Fixing and Cleaning the Topology |
| 03:09 | UV Unwrapping in Blender |
| 08:59 | Texture Baking |
| 10:07 | Substance 3D Painter Texturing |
| 28:20 | Rigging the Character with Rigify |
| 31:08 | Unity Humanoid Rig Configuration |
Loads the YouTube player when you press play.
Watch on YouTube