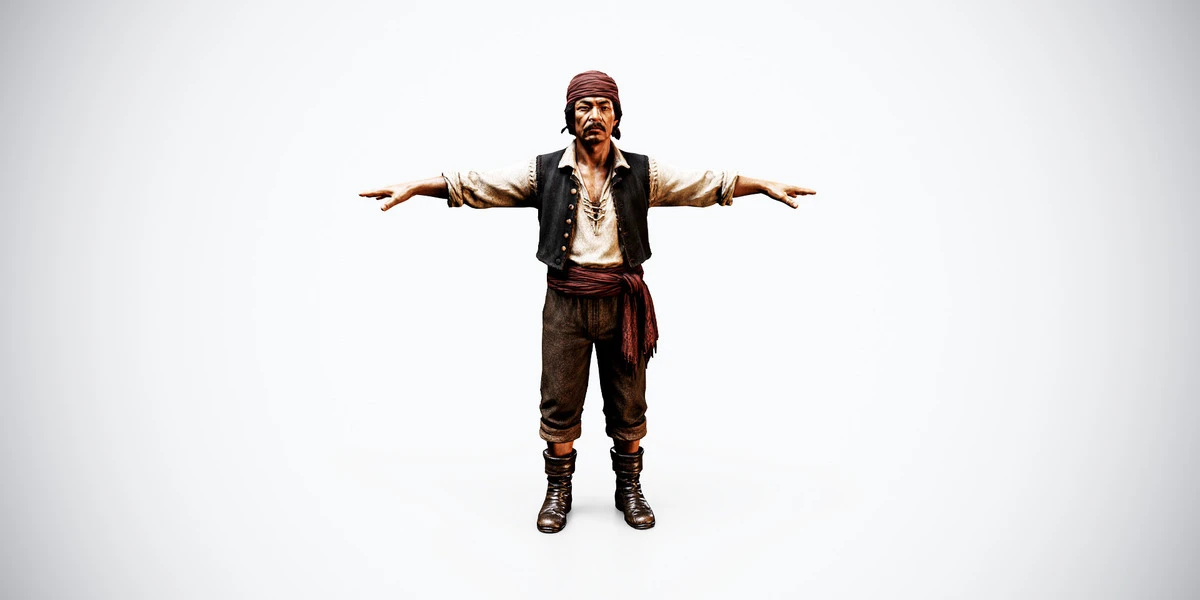
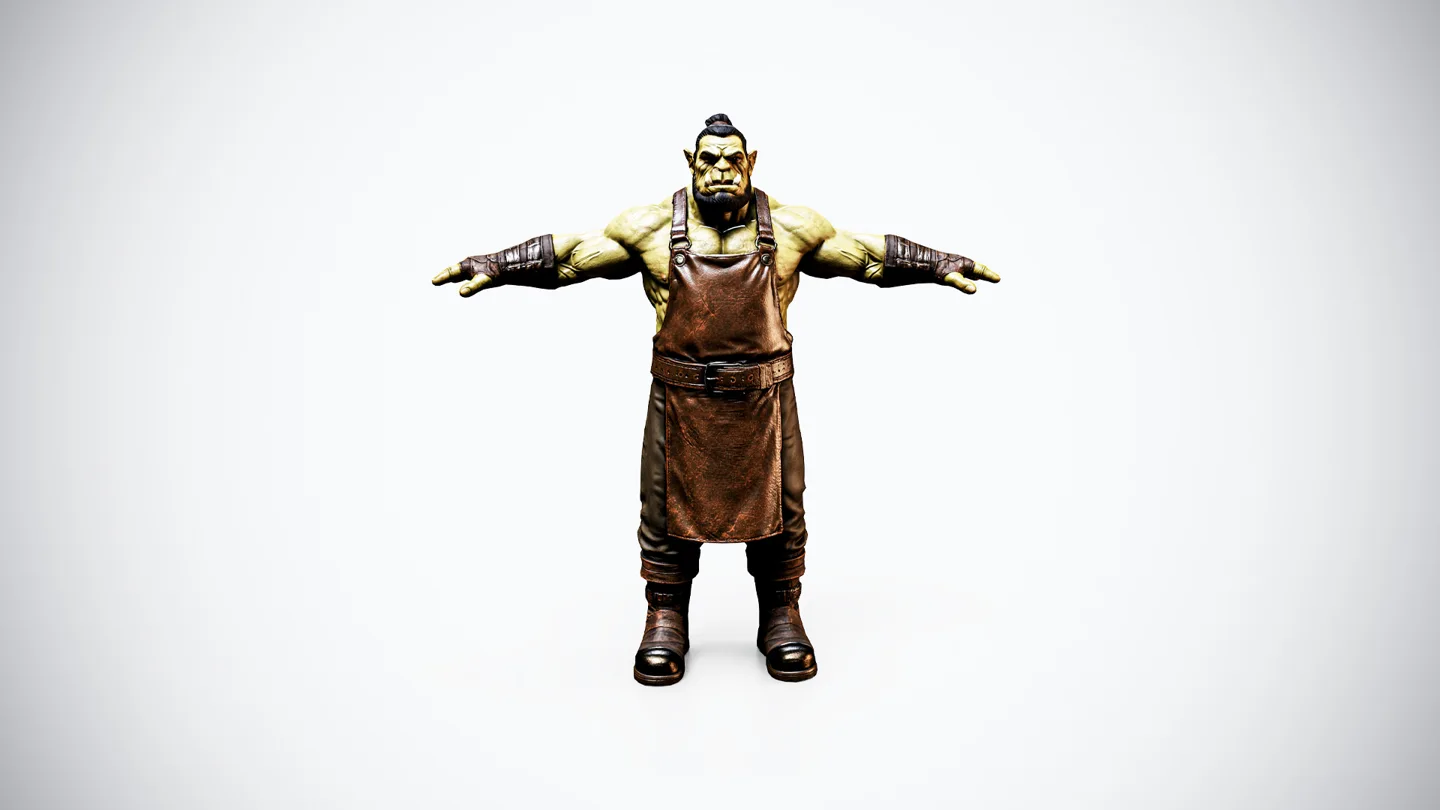
A valid Unity Humanoid Avatar is the beginning of a character test, not proof that every animation will look good. Before placing a purchased character in a full level, check bone mapping, skin deformation, clothing intersections and movement with a small set of representative clips.
This checklist focuses on evaluating a rigged character after import. It does not assume that animation clips, facial controls or gameplay scripts come with the model. For the earlier file and material steps, follow the Unity model import guide.
Check what the character package actually supplies
Separate the mesh, deformation skeleton, authoring rig and animation clips in your inventory. An authoring rig may contain controls designed for posing in Blender; the skeleton intended for export may be a different file. A rigged mesh can still be delivered without a walk, idle or attack animation.
The Rigged Pirate Sailor is a concrete example: its catalog page identifies a Rigify source, a simplified humanoid setup and Unity Humanoid testing, while explicitly excluding animation clips and facial controls. Plan your test clips accordingly. Do not spend time searching for expressions or motions that the product does not promise.
The Rigged Orc Blacksmith offers another useful test subject because its apron and heavier body proportions create different clearance questions. Consult that product’s package details separately rather than assuming that two rigged characters contain identical files or engine setup.
Confirm the Avatar before diagnosing the mesh
For a character intended for Humanoid retargeting, inspect the imported model’s Rig settings and Avatar configuration. Check that the required bones map to the intended body parts and that the reference pose is appropriate. A successful automatic mapping still deserves a visual review, especially around shoulders, hands and legs.
Unity’s Humanoid import documentation explains the mapping and configuration process. Use the documentation version matching your editor. Humanoid and Generic serve different structures; changing a label cannot make an arbitrary skeleton behave like a supported humanoid.
Start from the export intended for the engine. If you need to understand how the Blender source becomes a usable export, the AI-assisted pirate character workflow covers the larger production sequence. Do not delete rig controls from the only source copy while troubleshooting an imported model.
Build a small, repeatable test scene
Use a plain floor, readable lighting and a stationary camera. Add the character at the intended scale and play one known working clip at a time. Remove unrelated gameplay systems from the first test so that an input script, controller transition or camera collision cannot hide the origin of a problem.
Prepare three views: front, side and three-quarter. The front view reveals asymmetry; the side shows hip and knee motion; the three-quarter view makes volume loss and clothing penetration easier to see. Pause and scrub around suspect frames rather than relying only on real-time playback.
Use clips you are entitled to use and that fit the character’s intended role. A deckhand may need walking, reaching and crouching. A blacksmith may need a wide stance and overhead arm motion. Treat these as proposed tests, not animations claimed to be included with either asset.
Test the movements your project will use
| Test movement | Inspect closely | Record a useful result |
|---|---|---|
| Idle and weight shift | Feet, hips and shoulder symmetry | Stable or drifting, with the affected frame range |
| Walk and turn | Foot sliding, stride and orientation | Whether the issue changes with a different clip |
| Crouch or sit | Knees, hips and trouser intersections | The pose where penetration first appears |
| Reach overhead | Shoulders, elbows and sleeve clearance | Which side and which motion produce the defect |
| Grip or tool pose | Fingers, wrist angle and palm position | Whether the hand can meet the prop without distortion |
A stress pose is useful evidence, but judge it against the required action. A background NPC does not necessarily need the same deformation range as a close-up combat character. Write down the actual acceptance criteria before deciding whether a limitation needs fixing.
Diagnose the layer that is failing
If the whole character faces the wrong way or changes scale, investigate transforms and import setup before editing weights. If a limb moves in the wrong anatomical direction, revisit mapping and the reference pose. If the intended bones move correctly but the mesh collapses locally, examine skinning and topology in the source file.
If the body looks correct but a sleeve or apron intersects it, the issue may involve garment clearance, weights or the motion’s range. Replacing the entire animation system is unlikely to solve that specific defect. Likewise, sliding feet can involve clip motion and how the controller moves the character; it is not automatically a mesh problem.
The FBX export troubleshooting guide helps with transfer problems. Keep fixes small and repeat the same test after each change, so that you know which correction improved the result.
Save an acceptance record with the prefab
Record the character version, Unity version, selected export, Avatar, tested clips and any known pose limitations. Save screenshots of relevant problems and note whether the final camera can see them. This makes a later update much easier to compare.
Once the basic test passes, follow the Unity prefab workflow to preserve the setup. Keep a clean evaluation scene alongside the gameplay scene: it lets you distinguish a changed asset from a changed controller. Use the game-ready model collection to choose a character for a defined role, then validate that role with evidence rather than the word “rigged” alone.