
How long has this car been parked? The leaves in the air tell you it’s autumn. The leaves caught between the hood and the windshield tell you something about the car: nobody has cleared them away. Remove the airborne leaves and the second clue still works. Leave the car spotless and you get a different picture altogether. It might have pulled up a minute ago.
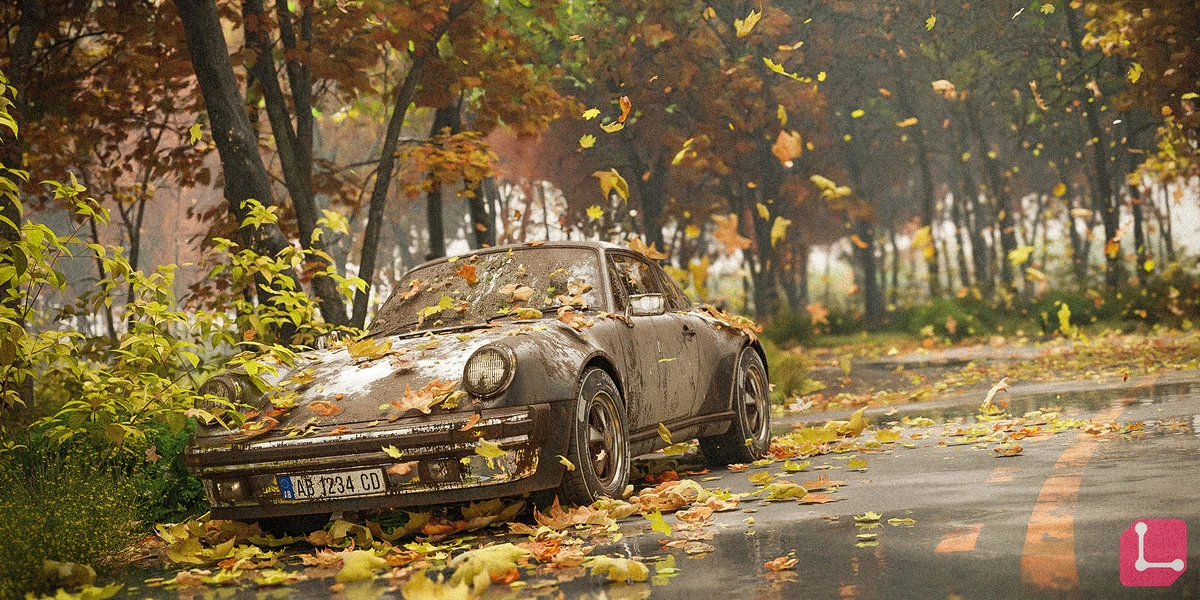
That distinction is useful when weathering a Blender scene. Give each mark a cause, then decide how close the camera needs to get before the mark matters. We’ll use two subjects from Lazy3D’s product images: a car left outdoors and a television left indoors. Both have been sitting still. They shouldn’t collect the same dirt.
3DSkillUp may earn a commission if you buy through the Superhive product links in this guide. The example renders and interface images are by Lazy3D.
Give the car a history before you give it rust#
For your own scene, finish this sentence: “The car still runs, but ___.” Try “it’s been parked under a tree since the weekend.” You now have a reason for loose leaves on the hood, a clear patch around the driver’s door handle and perhaps a streak from yesterday’s rain. Heavy moss across the wipers would suggest a different history. Keep that idea for the version where the car has been abandoned.
Save a render of the clean car from your final camera. Make sure you can tell the paint, rubber and glass apart under that light. You’ll want that image later: it’s surprisingly easy to put so much dirt on three good materials that they all start looking like the same fourth material.
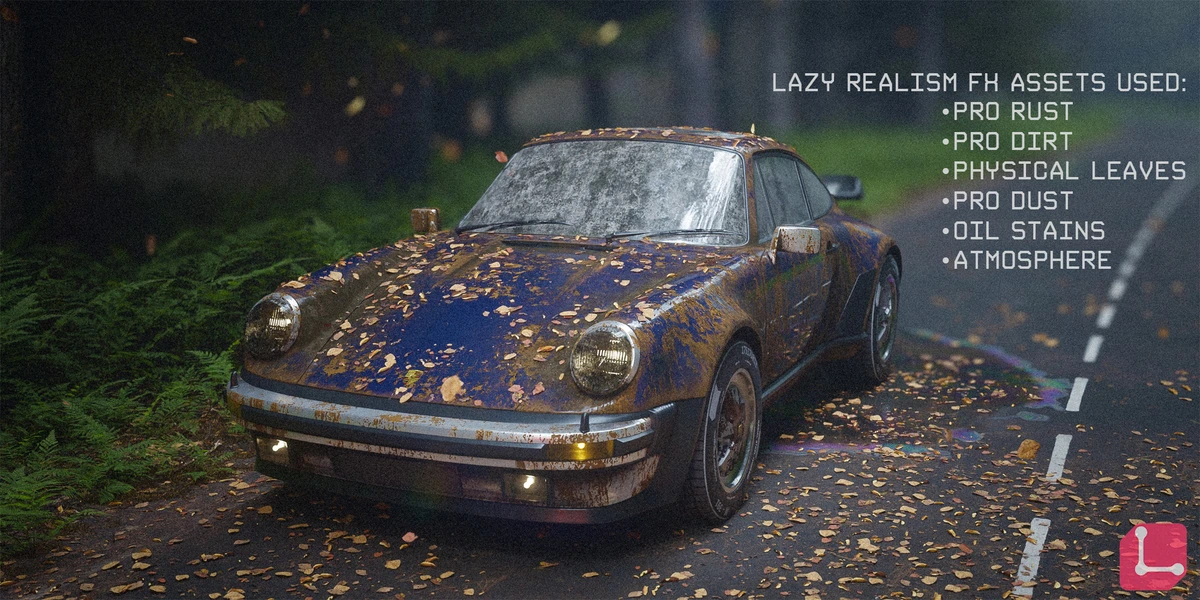
Build one boundary first. On a painted steel fender, pick a chip that exposes the steel; let a little rust spread from there. In Blender, a useful way to inspect the placement is to preview the mask as black and white. If the same white speckles run uninterrupted across the steel panel, rubber seal and glass, restrict the mask to the panel before refining its noise. Dirt can cross that seam. Rust from the steel can stain its neighbor, but the rubber itself doesn’t corrode like steel. Our rusted metal material walkthrough shows how to separate corrosion from the exposed metal underneath.
This is where Lazy Realism FX for Blender earns its place. It gives you a library of shaders and generators to start from. Try a rust treatment on the bodywork, keep it out of the trim, then judge the result from the saved camera. The useful shortcut is being able to spend that pass deciding where the paint survived.
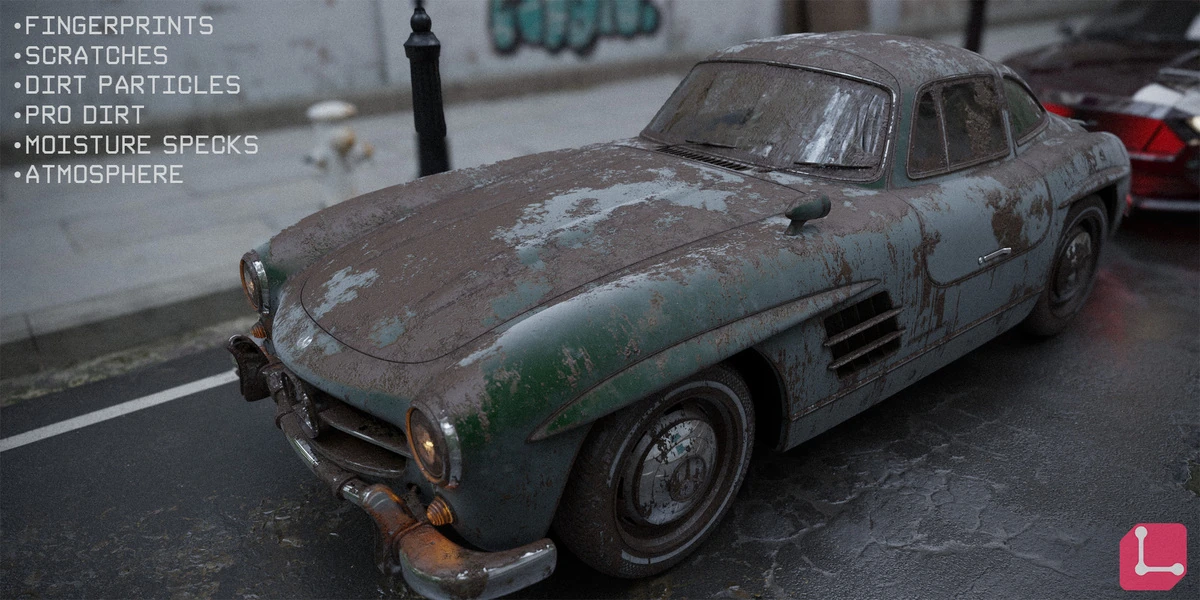
Let the ground explain what happened#
In the shot below, the bright oil film draws your eye straight to the wheel. That’s handy if the shot is about a leak. If it’s about the faded badge on the hood, the very same effect competes with your subject. Start with one patch on the asphalt near a plausible drip point. Move the camera back to its final position before you enlarge it or add another.
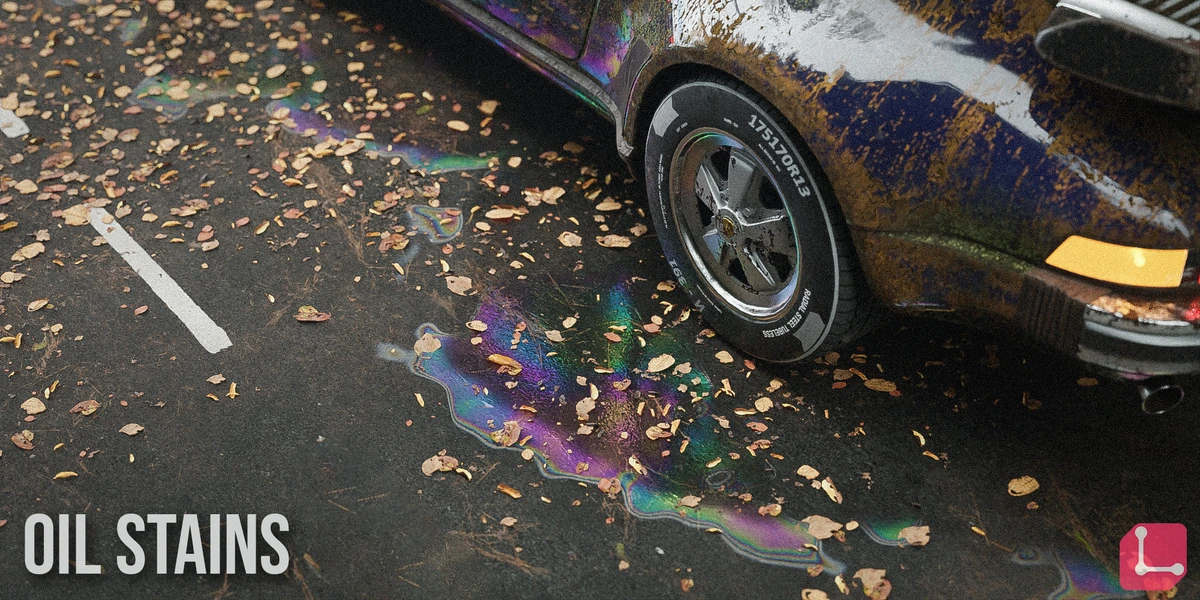
Leaves need a different placement rule. Look for a lip, curb or tire that would stop them as they slide. Cluster a few there and leave a stretch of pavement relatively bare. For a low camera, turn one or two leaves so their tips lift off the ground: the small shadow explains their shape. For a wide shot, check the outline of the whole cluster before spending time rotating individual leaves.
Decide when moss needs to stand off the surface#
At the base of the windshield, the moss has two visible scales. There’s a thin green film across the panel and a tuft thick enough to interrupt the line of the wiper. If you paint both into a flat color texture, you can describe the stain but the wiper will still have a ruler-straight edge in profile.
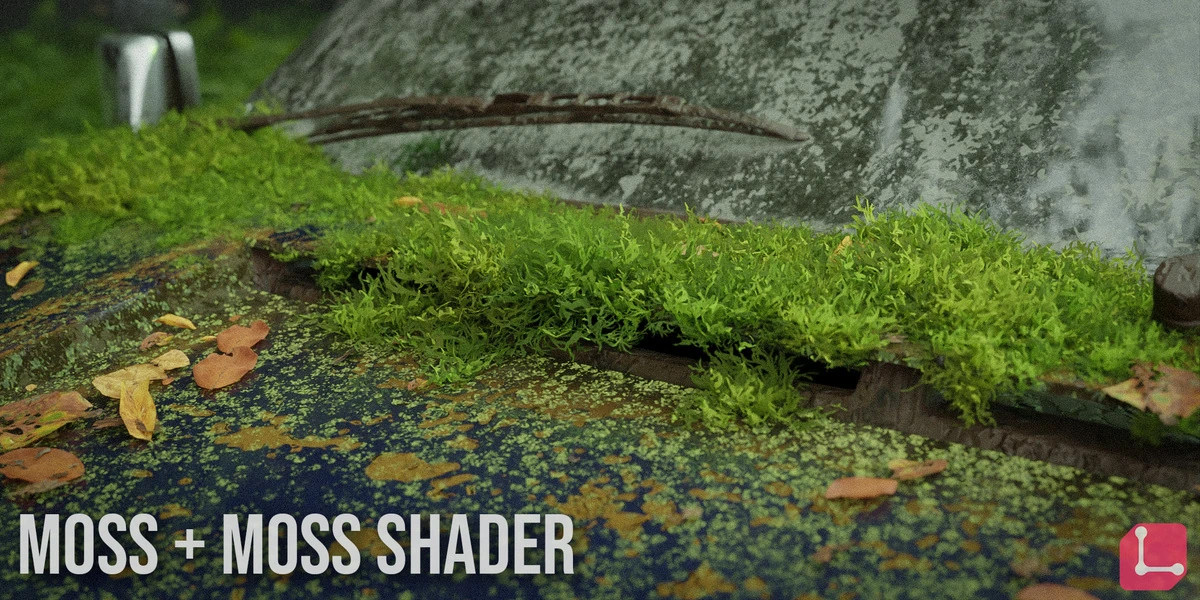
Try the cheaper decision first: use a shader for the thin spread, then add scattered moss geometry only along the ridge that the camera sees. To place it, think about where water might linger and which parts get wiped, touched or brushed clean. If this is a car in regular use, keeping the wiper’s swept area clear can tell a better story than another patch of growth.
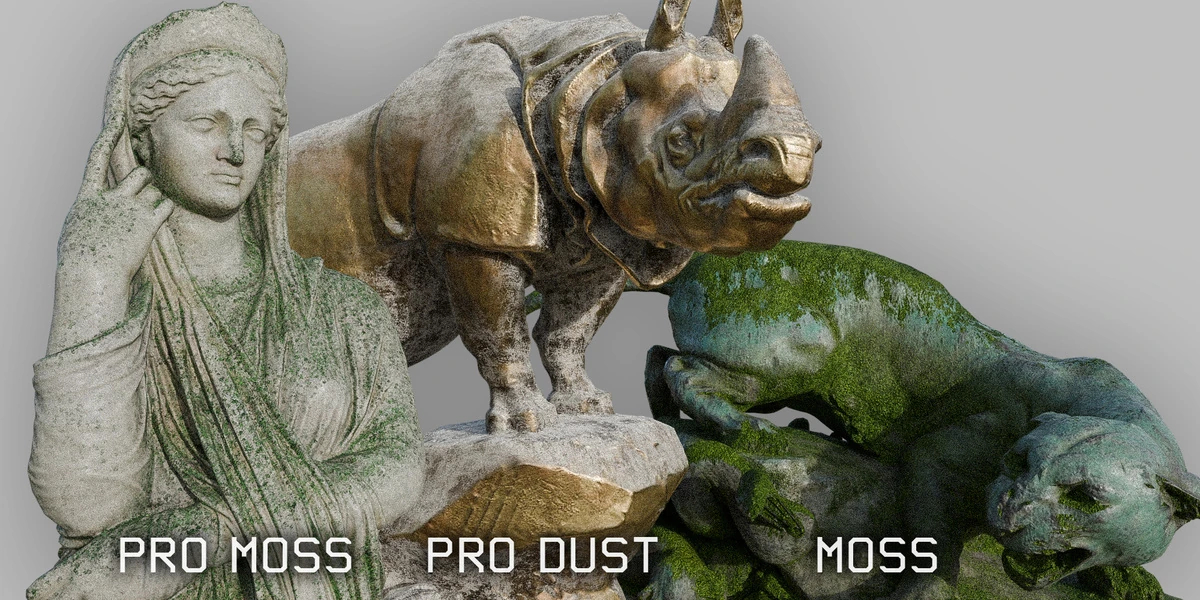
Make dust visible without turning everything gray#
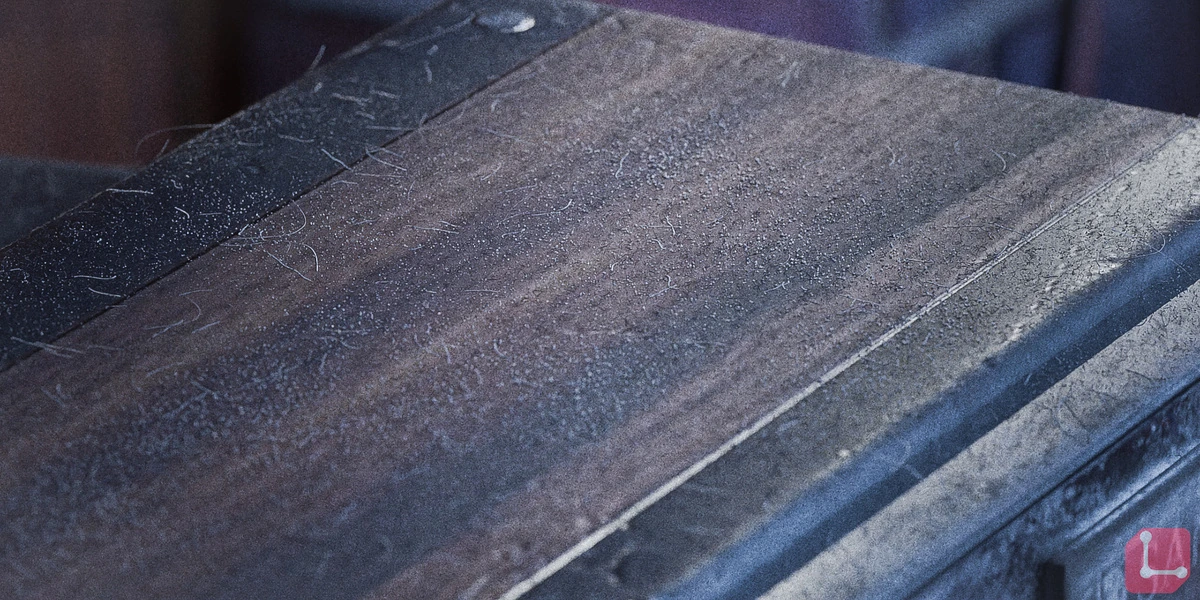
Indoors, swap the car for the TV. The cabinet top, the glass face and the tuning dial are close together, but they have different histories. Dust can sit undisturbed on top for weeks while someone still turns the dial. Start with the top surface. Leave the dial mostly clean, then put a thinner film on the glass so the screen still reflects the room.
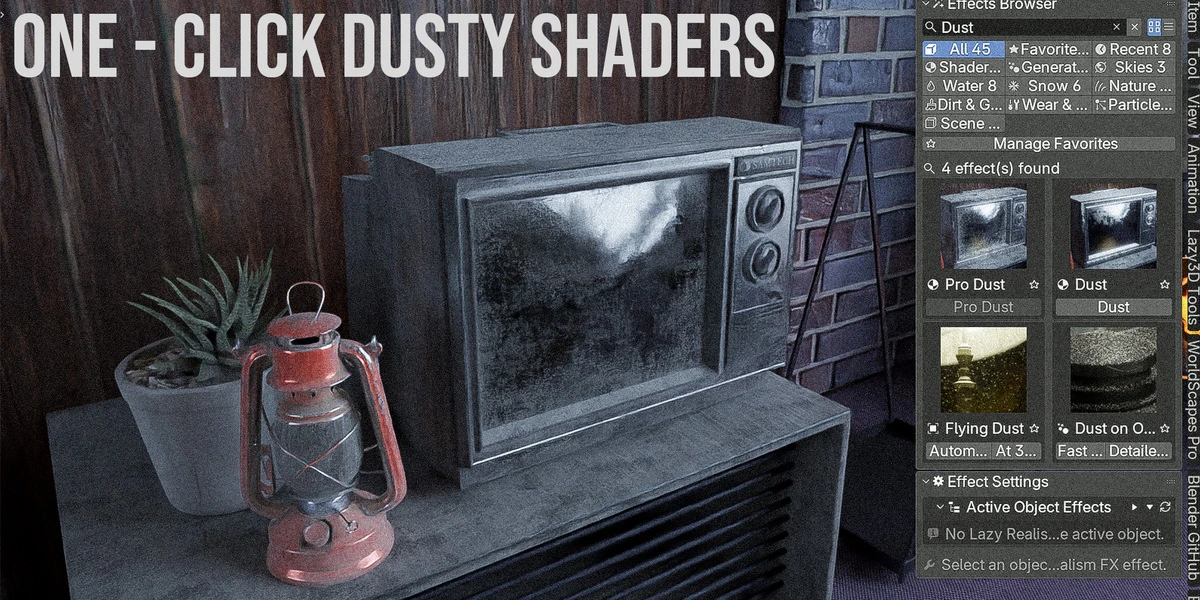
If the screen looks like gray cardboard, turn off the dust color temporarily. Move a broad light so its reflection crosses the boundary between dusty and clean glass. Can you see the boundary in the highlight alone? If so, bring back only as much color as you need. If not, inspect the roughness difference before adding more gray. The guide to reading roughness maps explains what to look for in that reflection.
Pick the edition and render engine for the shot#
Choose the effect you actually need before choosing an edition. Lazy3D’s edition guide lists Dust on Object in Lite. If the shot depends on Physical Leaves or Moss Scatter, look at Base. Moisture Specks and Lazy Atmosphere are among the additions in Pro. A dusty indoor still and a car sitting in wet woodland are good reasons to make different choices.
The render engine matters, too. In the developer’s effect compatibility FAQ, Oil Stains is designated for Cycles, and the edge masks for Pro Rust and Pro Dirt are unavailable in Eevee. If your delivery must use Eevee, check the specific effect there before designing the shot around the catalog render. You can compare the Lazy Realism FX editions on Superhive once you know which effect your scene depends on.
For one last check, put your clean render beside the weathered version at the size people will actually see. Hide your most elaborate layer. If the scene still says “parked under a tree” and the hood is easier to read, leave that layer off. If removing three leaves from the windshield makes the car look newly arrived, put those three back.