A believable bakery display in Blender distinguishes raw dough, baked crumb and toasted crust before adding decorative props. Their shapes, colors and surface response should tell the viewer what stage of preparation each item represents. One glossy material across the whole counter weakens those differences.
This exercise builds a small display with a dough preparation area, a muffin and a toasted slice. It is a material and scene-planning workflow, not a recipe for simulating baking. You can reuse the decisions for a café counter, a game environment or a still-life product render.
Use the food PBR foundation guide if you need an overview of serving geometry and texture scale. Here the goal is to coordinate several food states in one shot while keeping each one recognizable and giving detail to the surfaces the camera can see.
Divide the counter into purposeful zones
Choose one visual focus. A foreground toasted slice might be the hero while a muffin tray and dough ball provide context. Give each zone enough space that the viewer can understand its role. Crowding every surface with food makes it harder to judge both the materials and the story.
Block the counter, tray, board and food with neutral materials. Establish where each item touches its support and how its silhouette overlaps neighboring objects. A convincing texture cannot correct a muffin floating above its tray or a thin slice intersecting the board.
Set approximate real dimensions from your references and keep familiar props nearby. The asset scale workflow is useful when combining independently modeled containers and food. A dough crease that reads naturally on a small ball can look like a canyon when the object is enlarged without reconsidering the map coverage.
Assign a material to the correct food surface
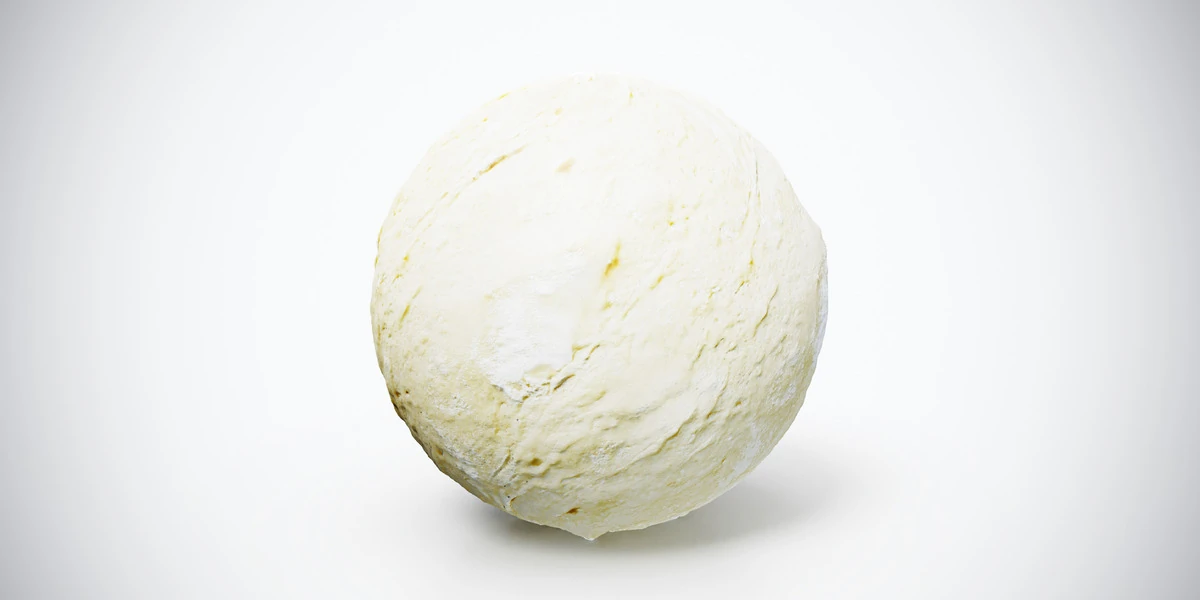
Use the raw pizza dough texture on a modeled dough ball or preparation surface. Its pale folds and flour-like areas suggest a soft uncooked surface. Build the large fold, flattened underside and overall shape in the mesh before applying the fine surface pattern.
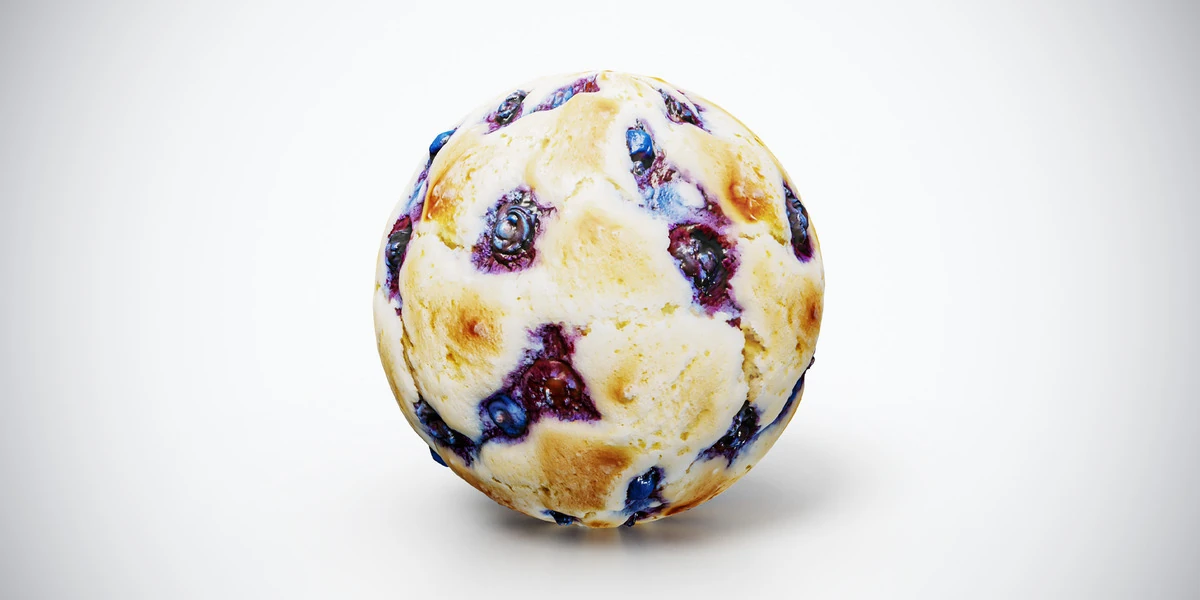
The blueberry muffin material gives the baked study a pale golden surface interrupted by berry patches. Use it where that pattern fits the modeled food. A paper wrapper, exposed underside or cut face requires separate consideration; the sphere preview does not promise a complete muffin asset.
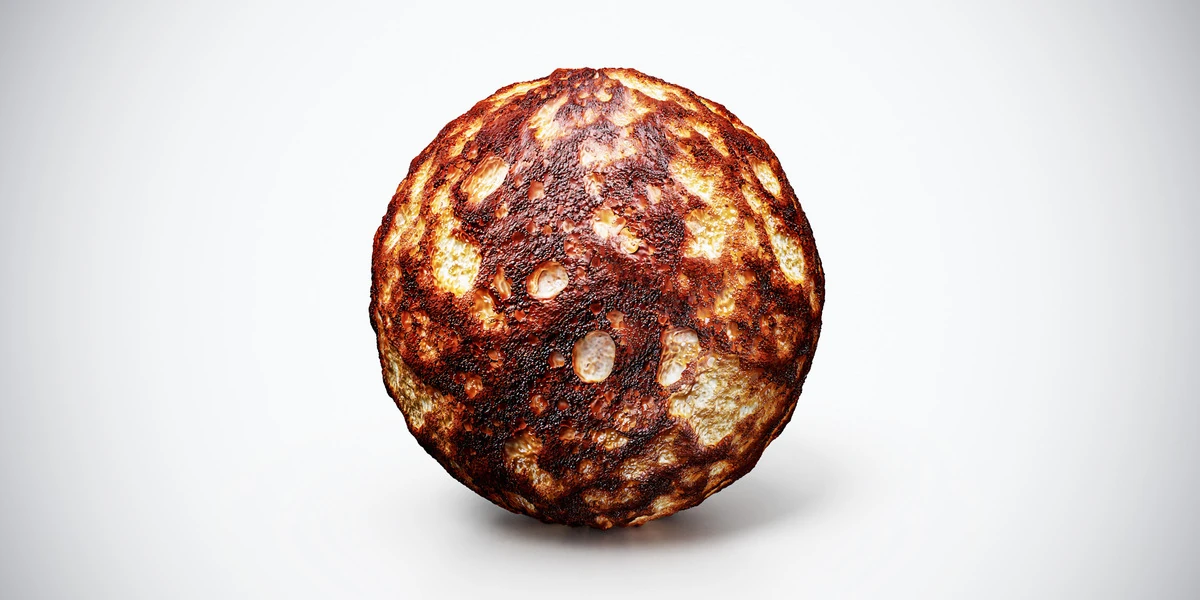
For the darkest baked study, the toasted bread texture provides irregular browned areas and lighter porous regions. Place those on the appropriate visible surface of a slice. Model the thickness, edge and any exposed interior so the food still reads as bread when the camera moves lower.
Keep exterior crust and cut crumb distinct
A sliced object exposes a surface that was not on the outside during baking. Treat that cut as a deliberate part of the model and material layout. Reusing the same toasted exterior pattern across the cut face can make a thick slice look burnt all the way through.
Use separate assignments or authored texture regions where the reference calls for different crumb and crust. Match their boundary to the geometry. If a slice is only a background shape, a restrained solution may be sufficient; if the cut face fills the frame, its pore structure and color deserve their own work.
Avoid using dark color alone to represent deep cavities. Inspect whether the pore detail remains credible under a change of light. The PBR setup guide helps keep color, normal and roughness channels in their intended roles while you develop the material.
Match the pattern to each item’s size
Choose one recognizable feature on each surface: a dough crease, a blueberry patch or a toasted pore. Compare it against the food’s dimensions and your reference. Adjust texture coverage before trying to solve the problem with a larger image or stronger bump.
Keep the top, sides and underside under review. A texture can look plausible from above while stretching around a steep muffin edge. If stretching appears, revisit the unwrap and the placement of seams. Small hidden regions can tolerate a simpler treatment, but visible edges should not change pattern scale abruptly.
The texture-resolution guide helps decide whether additional pixels will survive the final camera distance. Use that decision after choosing the pattern scale. Increasing resolution makes the same pattern sharper; it does not make an oversized blueberry or crease smaller.
Preserve differences in surface response
Start with the supplied roughness and normal maps, then compare the three foods under the same illumination. Look for differences that make sense in the reference: a dry toasted surface, a soft dough finish and local berry highlights should not collapse into one uniform response.
Avoid assuming that every soft food needs strong subsurface scattering. Blender’s Subsurface Scattering reference describes internal light scattering, a different effect from glossy surface reflection. If you test it, keep object dimensions fixed and compare a restrained version with scattering disabled.
The aim is to preserve the structure of the food. Excessive softening can hide pores and make bread look waxy. Start with an interpretable surface material, then add only the effect that addresses a visible issue. The roughness workflow is a useful reference when the real problem is broad plastic-looking highlights.
Choose a counter that supports the food
A work surface establishes context and also affects contrast. Pale dough can disappear against a similarly bright counter, while a very dark background may exaggerate toasted patches. Test the food against a simple neutral support before choosing the final wood finish.
Try a light wood surface when you want a bright display, but keep enough tonal separation around the pale food. Position the strongest grain away from the main ingredient details if the patterns compete. Consider a plain plate or cloth where a clean boundary would help the composition.
Orient the counter grain and board joints according to its construction. The furniture wood grain workflow shows how to keep directional materials coherent across separate parts. The same principle applies to a serving board, counter front and shelf, even when they share one texture family.
Use light to reveal crust without over-darkening it
Place a broad side light so the food shapes and shallow surface changes remain readable. Rotate the light before increasing relief. A nearly frontal light may flatten the crust pattern, while a very low angle can exaggerate every bump and make the food look hard.
Keep exposure consistent while comparing materials. A warm bakery mood can be part of the final image, but retain a neutral check so color decisions are not made entirely under orange illumination. The HDRI product-render workflow provides a useful framework for comparing those conditions.
Contact deserves as much attention as the shader. Check the dough’s flattened base, the muffin’s support and the toast’s resting edge. Small shadow gaps can reveal floating objects that are otherwise convincing. Add loose crumbs only where they improve scale or explain preparation, rather than covering every surface to hide weak contact.
Review the display at delivery size
| Check | What a useful result shows |
|---|---|
| Material distinction | Dough, baked crumb and toast remain different |
| Cut surfaces | Interior crumb is treated deliberately |
| Pattern scale | Creases, berries and pores fit their objects |
| Counter relationship | Food separates clearly from the support |
| Contact | Every visible item rests plausibly on its surface |
Render the intended crop before polishing details outside it. Save the scale choices, material assignments and lighting comparison with the scene. The food PBR collection offers alternative baked and ingredient patterns if you need another display item. Expand the scene only after the existing food states are readable together; that gives each added asset a clear purpose.