
From glass materials and liquid shaders to bubbles, condensation, ice, and professional product rendering.
Realistic glass in Blender starts with believable wall thickness, a transmissive material and something useful to reflect. A convincing drink adds another layer: the liquid needs its own volume, surface and color behavior. Bubbles, ice and droplets become effective once those foundations work.
For a product image, I would build the scene in that order: silhouette, glass, liquid, lighting, then serving details. This makes it easier to identify why a render feels wrong instead of covering the problem with more effects. The workflow below applies to a single studio glass, a restaurant table or a complete bar scene.
Glassware, developed by Mark Peters, brings glass models, drink presets and editable effects into one Blender addon. It can handle much of the repeated setup while you concentrate on presentation. The current listing includes 28 glass designs, 100 drink presets and 15 effects, with several effects marked Beta. It requires Blender 5.0 or later and Cycles for drinks and effects. The product images in this guide are by Mark Peters.
Affiliate disclosure: This article contains affiliate links. I may earn a commission if you purchase through them.
If you regularly create beverage visuals, explore Glassware on Superhive as a starting library for the workflow below.
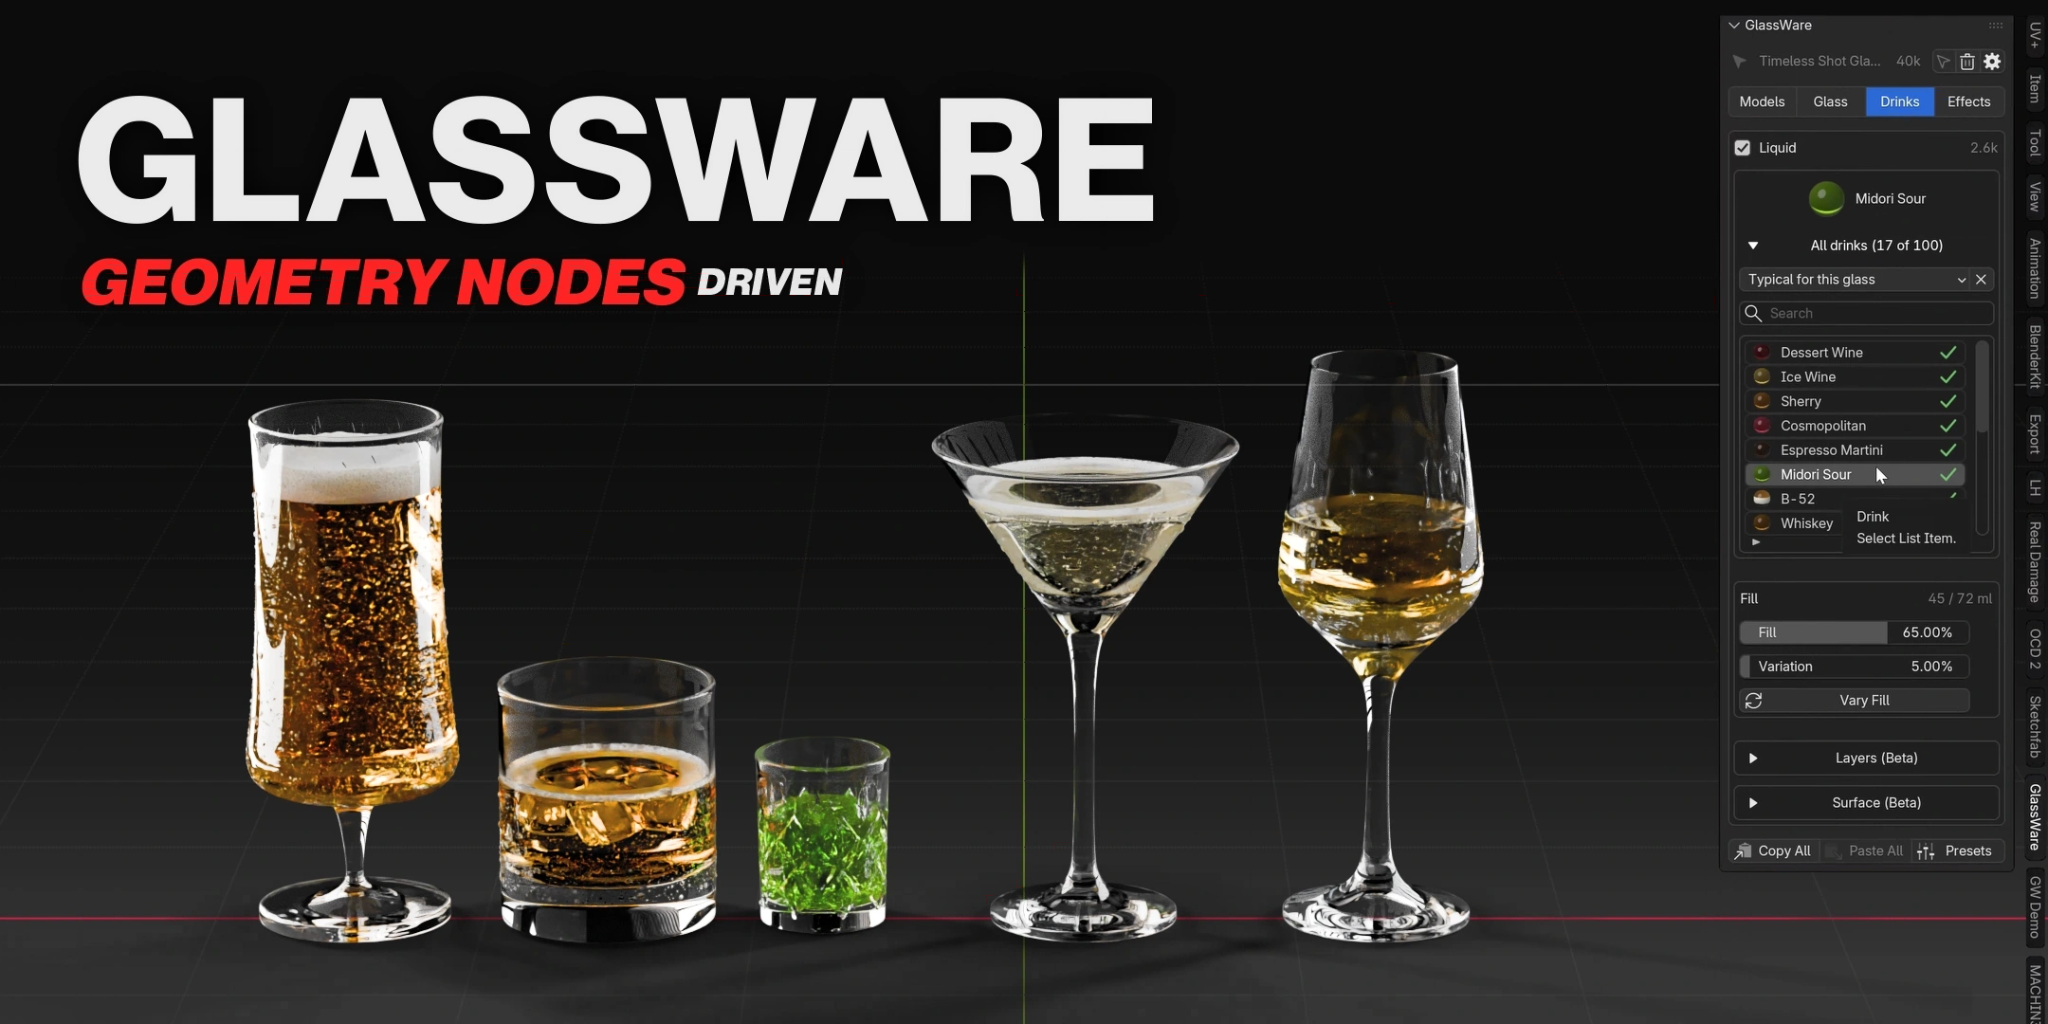
Start with the glass silhouette and real dimensions#
Choose the vessel for the drink and the composition. A tall pilsner creates a different silhouette from a wide cocktail glass; a heavy tumbler emphasizes the base and the liquid inside it. Establish the camera and output ratio before adding tiny details.
Work at plausible dimensions. A glass accidentally modeled several meters tall makes every later decision about thickness, ice and droplets harder to judge. Compare the rim diameter and height with a reference object. The consistent asset scale workflow is useful when combining props from different libraries.
Give the walls, rim and base visible structure#
A drinking glass needs an outer surface and an inner cavity connected around the rim, with a closed glass base. It should be a watertight shell of glass around an open space, not a solid cylinder filled with glass material.
For a simple custom model, revolve a side profile or build the outer shape and add thickness. Blender’s Solidify modifier can create that thickness; apply non-uniform object scale first and inspect the result around tight curves. Do not add another Solidify modifier to a library model that already has walls.
Check the cross-section, face orientation and small bevels at the rim. A thick base should look intentional, while a delicate stem needs enough geometry for a smooth silhouette at the final camera distance. Evaluate the empty vessel before introducing a liquid that hides part of it.
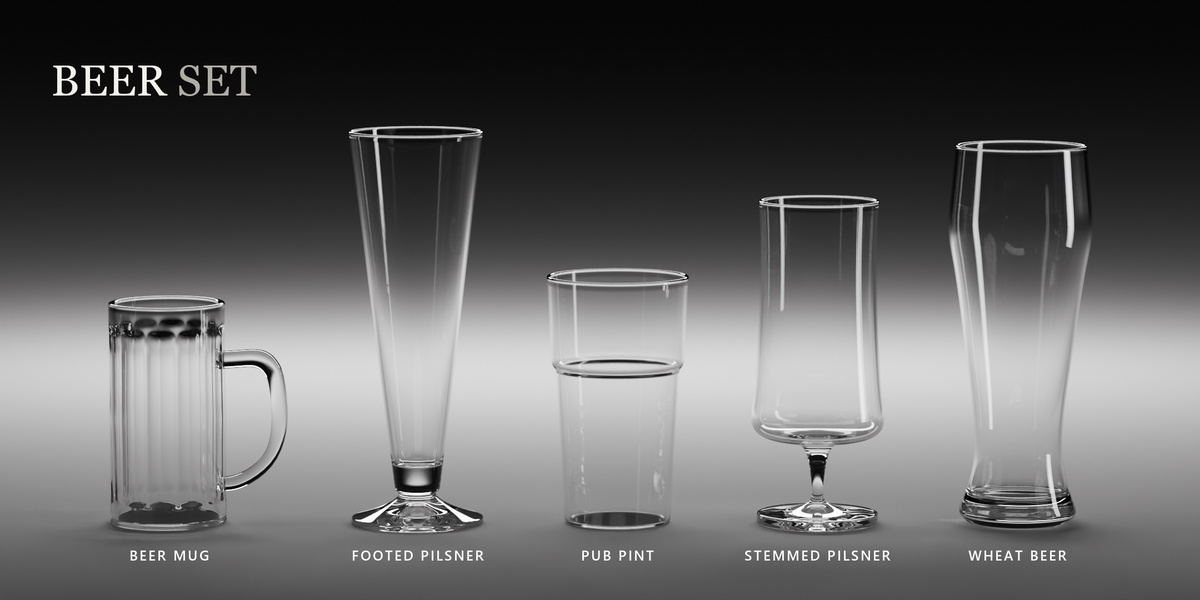
Build a clear glass material in Blender#
Start with a simple material so that geometry and lighting remain easy to diagnose. With the Principled BSDF connected to Material Output’s Surface input, these are useful starting values for ordinary clear glass:
| Principled setting | Starting point | Purpose |
|---|---|---|
| Base Color | White | Keep the initial glass neutral |
| Metallic | 0 | Glass is a dielectric |
| Transmission Weight | 1 | Allow light through the surface |
| IOR | About 1.5 | Approximate common glass refraction |
| Roughness | Around 0.02–0.08 | Explore a smooth surface with slightly softened reflections |
| Alpha | 1 | Keep a solid, transmissive surface |
The roughness range is an artistic starting point, not a measured specification. Use a reference to decide whether the glass should be polished, frosted or visibly worn. Blender’s Principled BSDF reference explains how transmission, roughness and IOR interact.
Avoid lowering Alpha to make the glass clearer: fading a surface does not reproduce refraction. Keep reflections visible; they are a major part of how viewers recognize transparent objects. If the glass disappears, inspect what it reflects before changing the shader.
Give the liquid its own shape and shader#
Model the drink as a separate closed volume following the inside of the glass, with a top surface at the intended fill level. Leave serving space below the rim. A modest curved meniscus at the edge can help the liquid feel in contact with the vessel, especially in a close-up.
Inspect the glass–liquid boundary in a test render. Avoid exactly coincident faces and visible air gaps. In Cycles, a small controlled overlap into the inner glass wall is a practical starting arrangement; keep it away from the outside surface and inspect refraction at the rim and base. Do not hide duplicate surfaces inside the model.
Separate surface reflections from color through depth#
For a clear, water-like drink, begin with a transmissive surface, low roughness and an IOR around 1.33. Real beverages vary, so treat this as a starting approximation. For colored liquids, retain a relatively neutral surface and connect a Volume Absorption shader to Material Output’s Volume input. Adjust its color and density while viewing both thin and thick parts of the drink.
Absorption lets the color deepen with the distance light travels through the liquid. Blender’s volume material documentation distinguishes that behavior from scattering. A cloudy drink may need scattering as well; simply increasing surface roughness makes the surface blurrier rather than creating suspended material inside it.
There is no universal density value: the mesh dimensions and optical path matter. Compare a narrow edge with the center of the glass. If everything becomes uniformly dark, reduce density and check the light behind the drink before increasing exposure.
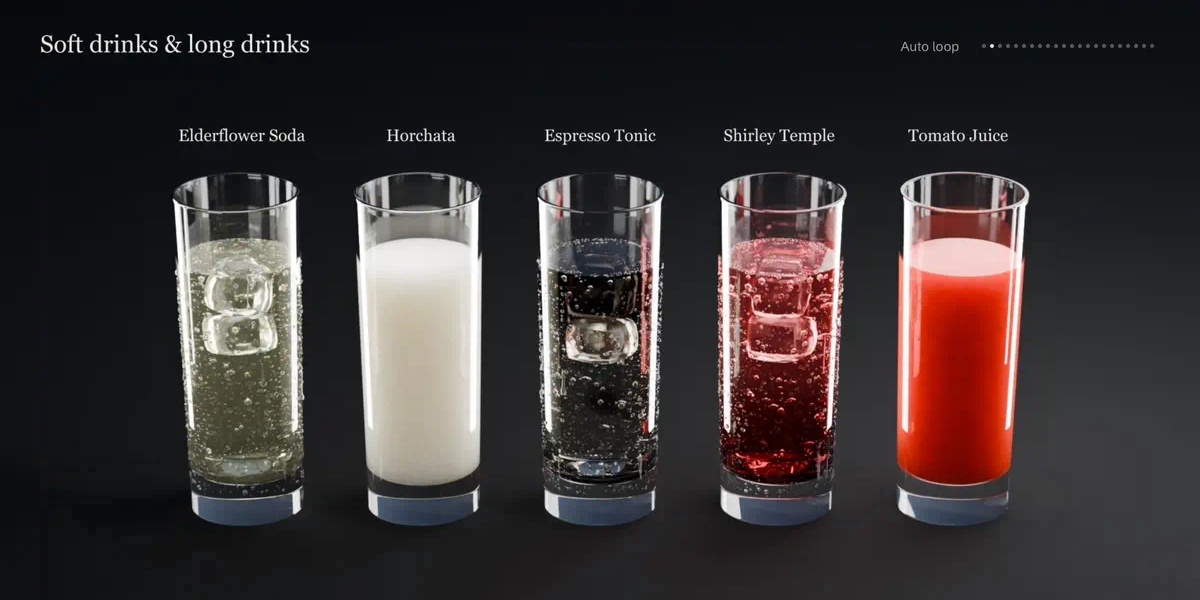
Add bubbles, condensation and ice with restraint#
Pick details that describe the beverage. A cold carbonated soda may call for bubbles, ice and droplets. A still drink at room temperature may need none of them. Adding every effect can obscure the liquid and turn the glass into visual noise.
Bubbles: vary size and distribution#
Use smaller bubbles as the main population, with occasional larger ones and some quieter areas. Check their size against the vessel rather than the viewport zoom. For a still image, judge their distribution from the final camera before increasing their number.
In Glassware, the Carbonation effect includes wall and surface bubbles, with an animation option for rising bubbles. Begin with a restrained setup, then inspect whether highlights still describe the drink behind them.
Condensation: make the glass feel cold#
Exterior droplets should sit on the glass surface, with variation in size and spacing. Avoid a uniform grid or droplets large enough to resemble decorative beads. Keep important rim highlights readable.
Glassware’s Condensation controls include droplets, mist, streaks and frost. Its Only Fill Level option can confine the effect below the drink line. Use that control as a visual choice, then compare the result with your reference.
Ice: shape and placement come first#
For custom ice, start with a few softly beveled, slightly irregular forms. Vary their rotations and check for obvious intersections with the glass. Keep enough open liquid visible to communicate its color. A little internal cloudiness can be useful, but uniformly opaque white cubes rarely suggest clear ice.
Glassware offers cube, large-cube and sphere options with controls such as size, float height, cloudiness and roundness. Its effects guide explains these settings. Make the arrangement readable before refining tiny surface details.
Light glass by designing its reflections#
A transparent object needs contrast in its surroundings. On a dark background, broad bright reflections can describe the sides. Against a bright background, darker reflected shapes can define the edges. Think about what the glass sees around it, not only the amount of light reaching it.
Start with one tall rectangular area light to the side and slightly behind the subject. Move it while watching the highlight travel over the bowl and stem. Change its size to alter the reflected shape. Add another source only when a specific contour needs separation.
A dark card beside a bright setup can introduce a useful reflected edge. A pale card can give the glass a broader light shape. Check both from the camera: moving a card a little may improve the image more than doubling lamp power.
Use an HDRI when the glass should reflect a surrounding place, then refine the important contours with local lights. The HDRI versus area lights guide explains that division of work. Keep the camera, exposure and material fixed while comparing light positions.
For a beachside drink, decide which side catches the low sun and which side needs readable detail. The golden-hour product lighting workflow helps you preserve the warm mood without letting the liquid become a dark silhouette.
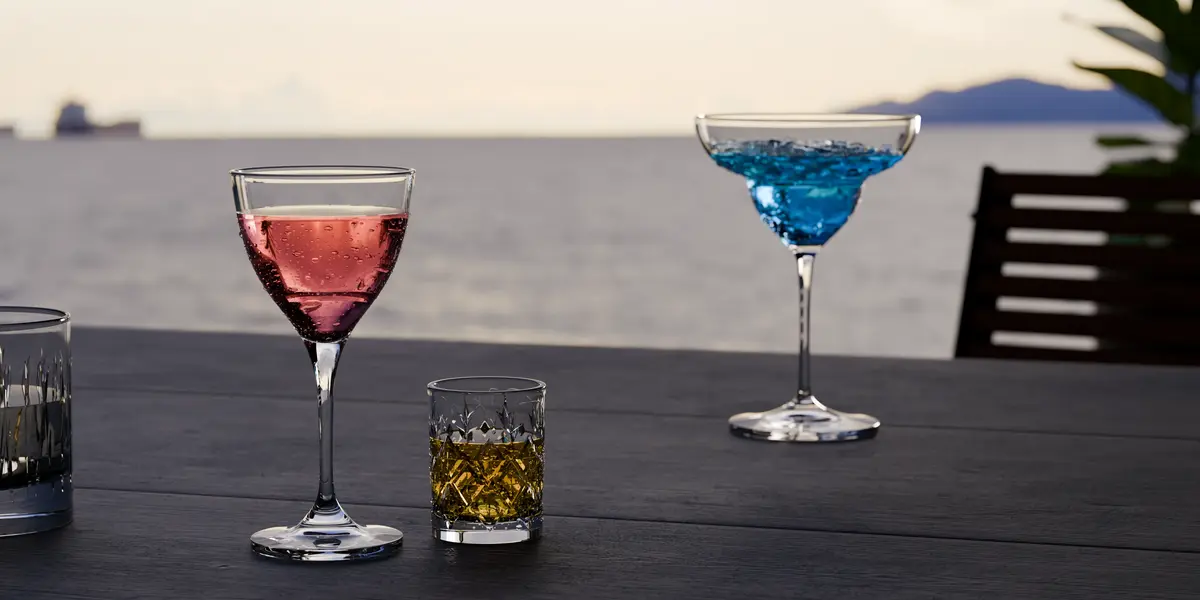
Use Glassware to assemble a reusable drink setup#
Once you understand the components, a procedural library becomes easier to art-direct. In Glassware, a useful sequence is:
- Choose a glass in Models. Select a shape that suits the drink and the framing, then add it to the scene.
- Choose a preset in Drinks. Select a beverage and establish its fill level before polishing the surrounding composition.
- Adjust the liquid. Refine the color, cloudiness and surface settings to support the intended appearance.
- Review Effects. Keep the bubbles, ice and condensation that help the shot; reduce anything that competes with the glass silhouette.
- Render a small comparison. Save the useful setup as a custom drink preset when you want to reuse it.
The developer’s drink controls documentation covers fill variation, layers and surface options. For a row of glasses, slight differences in fill can make the arrangement feel less mechanically repeated.
For dense scenes, the available Hybrid mode uses a lighter glass mesh in the viewport and a more detailed one for rendering. That lets you make composition decisions without always displaying the highest-detail glass geometry.
The addon is particularly useful for still product visuals and populated tables. Its optional Slosh (Beta) adds gentle motion to a drink in an animated glass; plan a separate fluid workflow when the brief requires pouring, spilling or splashes.
Compose a product image or a believable bar scene#
For a single hero glass, leave space around the rim and base. Avoid bright background shapes that cut across the stem. Use depth of field carefully: the important glass contour and the detail that identifies the drink should remain readable.
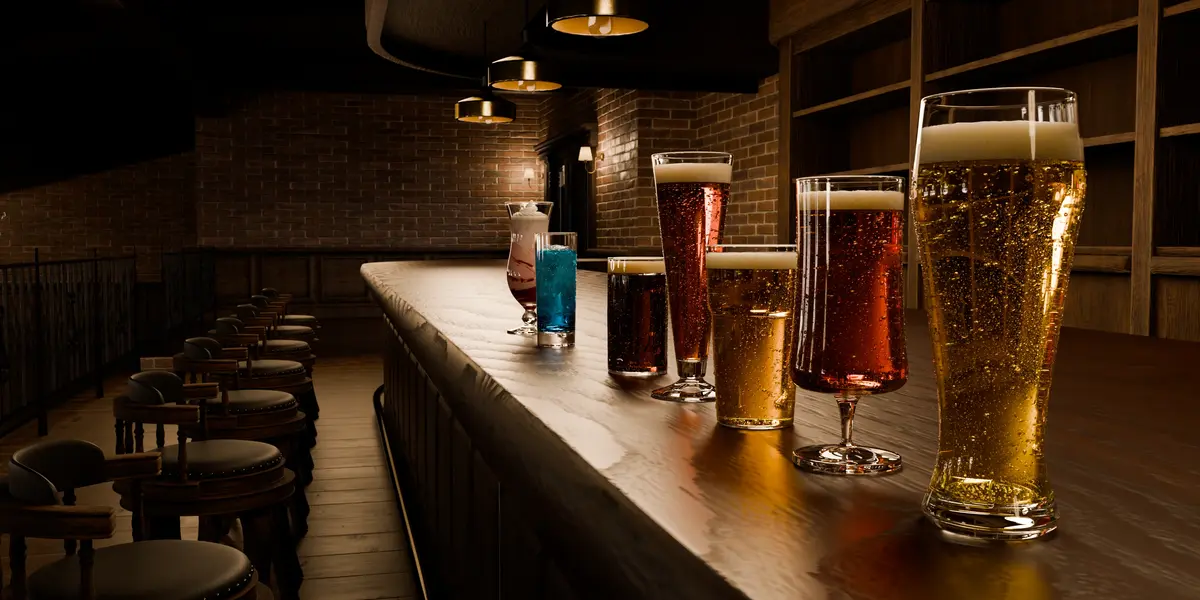
For a group, vary height and spacing before varying colors. Put the main drink where the lighting gives it the clearest silhouette. A background glass can support depth without needing the same visual weight as the foreground subject.
A countertop, table edge or chair can establish scale and setting. If you are working from a furnished scene, the Blender interior customization guide shows how to coordinate camera, props, materials and lighting. Check that the glass base actually meets the surface and that the contact shadow feels grounded.
For a rotating presentation, preview the entire turn: a reflection that works in the first frame may cover the drink halfway through. Use the HDRI lighting workflow for product turntables to evaluate highlights across the rotation before committing to the final sequence.
Refine Cycles settings and diagnose the final render#
Glass, liquid and ice create several transmissive surfaces along a camera ray. In Cycles, inspect Render Properties → Light Paths when dark areas appear inside otherwise plausible geometry. Total and transmission bounce limits both matter; increasing samples alone will not fix a ray path that terminates too early.
For Glassware scenes, Mark Peters provides a Render Guide with recommended settings and a test-scene option. Start there, then evaluate your own composition. His rendering documentation also explains why the drinks should be judged in Cycles rather than Material Preview and how to control expensive effects.
Render a crop containing the rim, liquid boundary and ice at the final output scale. Compare denoising on and off: small bubbles and thin reflections can lose definition when noise reduction has too little information. Raise sampling where the crop needs it rather than rendering a large image repeatedly while still adjusting the scene.
| Symptom | Check first |
|---|---|
| Glass seems invisible | Reflected surroundings and edge contrast |
| Liquid looks uniformly black | Absorption density, lighting, normals and transmission bounces |
| A dark line appears at the liquid boundary | Coincident faces, duplicate geometry or an unintended gap |
| Glass looks frosted or plastic | Roughness, transmission and overly strong bump detail |
| Droplets disappear in the final image | Their screen size, lighting and denoising |
| A library drink differs from its preview | Compatible Blender version, Cycles and the developer’s render setup |
Before delivery, confirm the active camera, output resolution, color management and render visibility. Check a clean image at its intended display size. The glass outline, drink color and serving details should work together without needing the viewer to zoom in.
Frequently asked questions#
Why does my glass look opaque in Blender?#
Check transmission, metallic and the render engine first. Then inspect the geometry, surface roughness and surroundings. A transparent material can still look dark when it reflects a dark environment or when absorption is too strong.
Can I make realistic drinks without a fluid simulation?#
Yes. A still beverage can use a closed liquid mesh, a suitable surface shader and optional volume shading. Simulation becomes relevant when the shot depends on changing fluid behavior, such as pouring or splashes.
Should I color the glass or the liquid?#
Treat them separately. Keep a clear vessel neutral and put the beverage color in the liquid. Tint the glass only when the reference calls for colored glass, so the two materials remain independently adjustable.
Does Glassware work in EEVEE?#
The current product specifies Blender 5.0+ and Cycles for drinks and effects. Empty glasses can also preview in EEVEE. Use Cycles when following the complete Glassware drink workflow described here.
What should I fix before adding more effects?#
Check the silhouette, thickness, liquid boundary and main reflections. If those are convincing, add only the details that communicate the serving style. A few readable ice cubes and droplets can do more for the shot than a dense layer of effects.