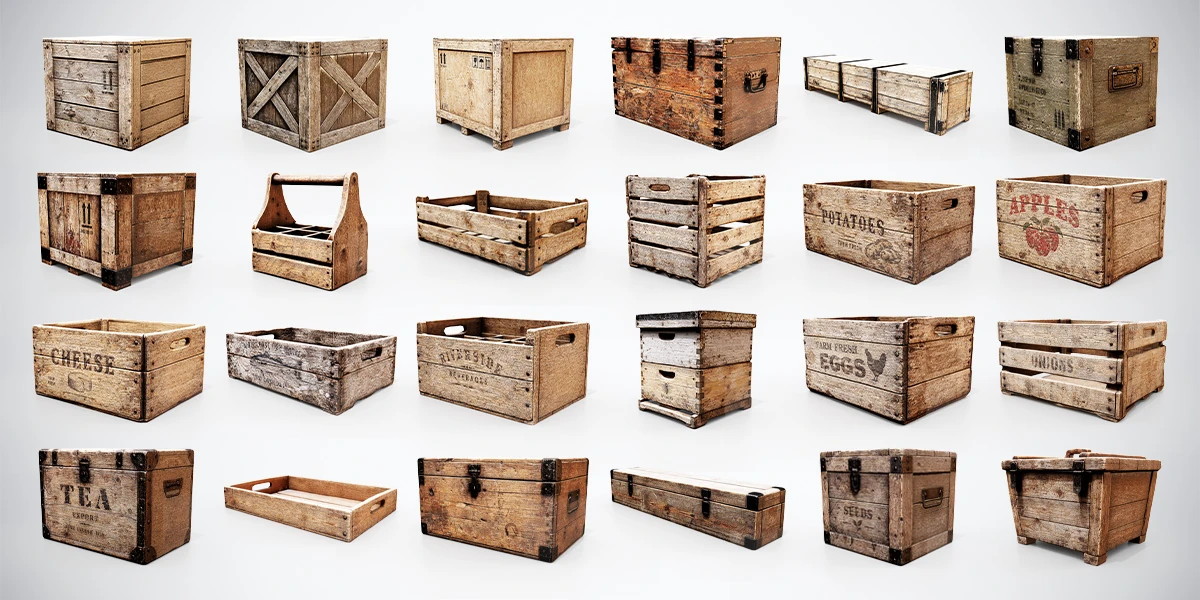
Good warehouse set dressing makes the movement of goods understandable. Before placing detailed wooden crates, decide where deliveries arrive, where supplies wait and where someone collects them. The resulting layout gives your props a purpose and helps players read the room.
This exercise develops a small game environment: a storage room supplying a nearby workshop. It focuses on the relationship between containers, activity and navigation. The dimensions and arrangements are artistic examples, not guidance for designing a real workplace.
Define what the warehouse stores and who uses it
Write a brief that can explain the objects you will place. For example: “A repair workshop has received a delivery, but only the urgent supplies have been unpacked.” That sentence establishes a current event, an unfinished task and a reason for different types of container to coexist.
Next, choose the handling method. Does one person carry supplies through a small doorway, or does the space need a route for large equipment? This decision changes the size and arrangement of storage groups. Do not fill the room first and attempt to squeeze an implausible workflow into the remaining gaps.
Keep the period and visual language consistent. An old timber storeroom and a modern distribution center can both contain wooden boxes, but their shelving, labels and handling equipment suggest different systems. Use the guide to choosing game assets for a visual style to establish those shared rules before mixing packs.
Block out four functional zones
Begin with a floor, walls, entrance and simple box placeholders. An imaginary room around eight by six meters is enough for this exercise, but choose dimensions that suit your game and camera. The objective is to make the workflow visible without signs explaining every corner.
| Zone | What belongs there | What the arrangement communicates |
|---|---|---|
| Receiving | A small group of recently delivered containers | Goods have just arrived |
| Long-term storage | Larger closed containers grouped along a wall | These supplies are waiting |
| Picking | Accessible containers with room in front | Items are collected here regularly |
| Packing or preparation | A work surface with a few nearby trays | Supplies are sorted before use |
Draw the route from the entrance to each active zone. Leave space where a person would stand to handle a container, not just a narrow line between its visible corners. In a playable environment, check this with the actual character controller; its collision shape may require more clearance than the camera suggests.
Avoid giving every zone equal visual weight. Put the interrupted task in one location and let quieter storage support it. The small interior composition exercise is useful when the room feels busy even though its individual objects look convincing.
Choose containers by their job
A useful prop selection contains different roles rather than many nearly identical boxes. Closed containers can establish larger storage masses. Open containers suggest access to contents, while shallow trays can sit near the place where items are sorted.
The 24 Wooden Crates & Boxes bundle provides a starting collection with closed crates, open produce containers, reinforced chests, a handled caddy and trays. For this exercise, choose a small subset that supports the four zones. Using all 24 models is not a requirement for a convincing room.
Treat the models according to their actual construction: the closed boxes and chests have fixed lids, and the pack contains static props without rigging or animation. A closed chest can suggest stored supplies; it should not be presented as an interactive opening container without additional modeling and gameplay work.
Check dimensions beside the doorway, work surface and a human reference before committing to the layout. Follow the shared scale workflow if the room combines assets from different sources. A small scale mismatch repeated throughout a stack can make the whole storage system feel unreliable.
Build groups around an action
Replace the placeholders one group at a time. At receiving, a compact cluster close to the entrance can suggest a recent delivery. Along the storage wall, align containers into recognizable families. Near the preparation surface, leave room for the next object someone would put down.
Use a simple grouping rule: each cluster needs a reason for being together. Containers might hold the same supply, belong to one shipment or serve the same work station. That reason should influence orientation and spacing. Frequently accessed fronts can face the route; long-term storage can read as a quieter mass.
Do not make every crate lean or rotate independently. Repeated alignment helps explain an organized space. Break that alignment where an action justifies it: one tray pulled forward, one container set down beside the receiving group, or an empty place where a box was removed.
Inspect every stack from the side. Bottom faces should meet their supports, and upper objects should look supported by the structure below them. Large unsupported overhangs and intersecting boards are more distracting than a shortage of small surface details.
Make repetition serve the storage system
Repeated props are appropriate in a warehouse. The problem is repeated arrangements that reveal the same recognizable pattern everywhere. Three identical clusters at equal intervals usually attract more attention than several matching crates stored as one shipment.
Vary the group before changing its materials. Change the number of containers, the height of a stack or the relationship between a large box and smaller trays. Keep some empty spaces. Then inspect whether a distinctive knot, stain or metal fitting appears at exactly the same angle in several prominent places.
The workflow for reusing props without obvious repetition develops this into a repeatable review process. Use it when your storage needs many instances but should still feel assembled for a purpose.
Tell one small story through placement
A strong scene does not need every object to suggest a separate event. In the workshop-delivery example, choose one interrupted action: someone has started sorting urgent parts and left the rest of the shipment untouched.
Support that action with a receiving group, one accessible tray and a preparation surface that still has usable space. If you add paperwork, loose parts or labels, those are separate dressing elements you create or source for the project; they are not implied contents of the crate bundle.
Keep wear consistent with the action. An exposed corner may receive more handling than a sheltered back face. A frequently moved tray might sit in a cleaner patch within an otherwise dusty area. These are opportunities for your own material or decal work, not a reason to cover every surface with equally strong dirt.
For the adjoining work area, the believable workshop environment guide connects storage to benches and tools. Let the transition explain why supplies move between the rooms.
Check the layout from three useful viewpoints
Save three review cameras or player positions: the entrance, the picking area and the back of the room. At the entrance, ask whether the route and current task are readable. At the picking area, check access to containers and the work surface. From the back, look for floating props and arrangements that only work from the main camera.
Review the scene with simple lighting before adding atmosphere. If a route is understandable only because a bright lamp points at it, its geometry may still need work. Light should strengthen a clear arrangement rather than conceal a blocked passage.
For an interactive scene, inspect collision geometry as well as the visible meshes. The Unity crate collider guide explains why a closed box and an open container may need different collision setups.
Finish with a subtraction pass: temporarily hide the least useful cluster. If the scene becomes clearer without losing its purpose, keep it out. A successful storage room explains what arrives, where it waits and how it reaches the work area; its value does not depend on displaying every available asset.