A convincing stone countertop needs believable dimensions, a readable edge and intentional texture placement. A high-resolution marble or granite material cannot correct stretched grain, an oversized bevel or a vein that restarts randomly on the front face.
This exercise builds one rectangular countertop in Blender and reviews it from a normal interior camera and a close edge view. The example dimensions are 2.4 meters long, 0.65 meters deep and 0.03 meters thick. They are modeling choices for this exercise, not construction specifications. Adapt them to your reference and scene.
Start with a simple supported slab without cutouts. Once that works, introduce a sink opening, a backsplash or a vertical return as separate mapping problems. This keeps the first test focused enough to explain why the surface succeeds or fails.
Define the slab before choosing a texture
Block out the top and the supporting cabinet. Confirm the dimensions in Blender’s item properties and compare the assembly against a known-size scene reference. The consistent asset scale guide helps when the cabinet and surrounding furniture come from different sources.
Set the dimensions before finalizing the bevel. On this new, unrigged exercise object, apply Scale in Object Mode so subsequent operations use a clean object scale. Blender’s Apply reference explains that applying transforms transfers them into the object data while preserving the visible placement. Save a copy before changing transforms on a more complex production asset with modifiers or linked instances.
Place the final camera now. A slightly elevated interior view needs the top and front edge to read together; a close product-style view may expose the underside and corner profile. Model the edge that those views actually reveal rather than judging the slab only from a top orthographic view.
Give the edge a deliberate profile
Add a Bevel modifier and inspect its effect on the slab silhouette. For this small exercise, an offset around one millimeter is a starting experiment, not a universal stone setting. Increase or reduce it against the reference and check that the selected width mode matches the measurement you intend.
Use enough segments to avoid a visibly faceted profile at the delivery distance. Check the underside and corners for unwanted intersections. Blender documents the modifier’s width modes and overlap protection in the Bevel modifier reference; the result still needs visual inspection on your particular geometry.
Use the practical bevel guide if you need to distinguish a shape-defining rounded edge from a small highlight-catching chamfer. A normal map changes shading, so it cannot replace an edge profile visible in silhouette. Choose the geometry first, then evaluate the material on it.
Shortlist one quiet material and one directional material
Select a fine-grained stone and a visibly veined alternative. These challenge the mapping differently: grain exposes stretching and changes in scale, while veins expose discontinuities. Keep the same geometry, camera and lighting for both tests.
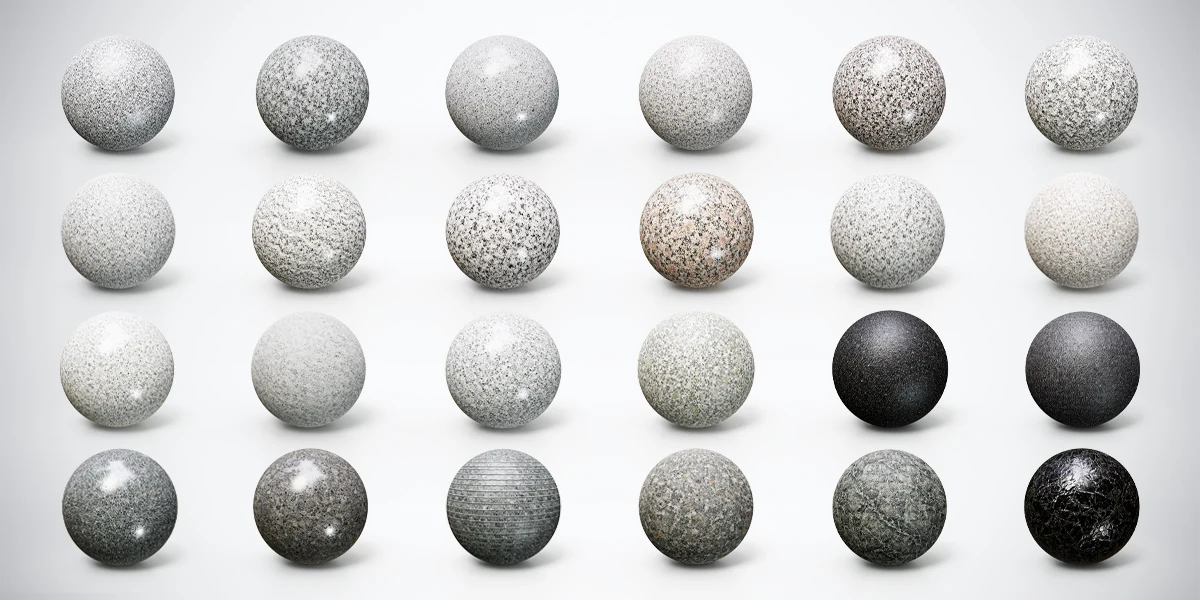
The 24 Granite, Marble & Stone 4K PBR Materials Bundle includes pale fine-grained options and gray-green or dark veined marble appearances for this comparison. Use the supplied textures appropriate to your workflow; preview spheres are reference presentations, not countertop geometry or ready-made scenes.
For the first slab test, the free Smooth Silver Gray Granite material supplies a 2K Metallic-Roughness option with fine dark speckles. Use it to inspect grain scale and the front edge before moving on to a more directional finish.
If the choice itself is unclear, use the granite-versus-marble selection exercise to decide which visual role the counter should play. A focal island can support a stronger vein than a worktop behind an already detailed hero object.
Validate the unwrap with a checker
Unwrap the slab with seams planned around the visible construction. Apply a labeled checker from the UV Checker Generator before judging the stone. Inspect the top, front strip, short ends and bevel transition.
The checker should reveal whether a square becomes a rectangle or whether one face receives a substantially different density. Correct those issues before using the stone’s irregular pattern to judge scale. The UV stretching guide provides a broader diagnostic sequence when the distortion is difficult to locate.
Keep a material-only view and a checker view available. It is easy to mistake an elongated vein for a UV problem, or to overlook real stretching because the source already contains long marks. The checker tests the mapping independently of the selected finish.
Set coverage instead of guessing from 4K
Decide how much surface one full texture repeat should cover. A 4K texture does not define that physical coverage. Where the product does not state a capture size, compare the grain or veins against references and record the result as your chosen mapping scale.
Suppose you choose a square coverage of 1.2 meters for the exercise. Across a 2.4-meter top, that gives two repeats along the length; across the 0.65-meter depth, it gives about 0.54 of a repeat. These values illustrate the relationship between object size and mapping, not the measured scale of any supplied material.
Check whether two repeated copies of a distinctive vein are acceptable. Reducing repeat count can help, but enlarging the whole pattern may make the vein implausibly broad. If those constraints conflict, choose a different texture region, a quieter candidate or a deliberately segmented surface. Extra pixels cannot solve an unsuitable pattern layout.
Use the texel-density workflow when the countertop must match the detail level of nearby props. Keep physical pattern size and detail per meter as separate decisions; changing one can affect the other, but they answer different questions.
Choose continuity or a visible joint at each edge
For an apparently continuous slab, keep the top and visible edge pattern aligned through the transition. An unfolded edge strip can share the appropriate border with the top island. Inspect both the checker and a distinctive vein as it passes around the corner; visual continuity also depends on how the bevel is mapped.
This mapping creates a plausible surface treatment. It does not reconstruct the internal structure of a real block of stone from a two-dimensional image. If a thick cut face is prominent, use references to decide whether a separate treatment is needed rather than assuming the top texture describes every cut direction.
For an assembled front strip or backsplash, an intentional seam can be more convincing than forced continuity. Keep the physical grain scale comparable across the pieces, then choose each island’s position deliberately. A separate piece may carry a different vein, but it should not accidentally appear to use a material at twice the scale.
For a waterfall-style vertical return, plan the top and side together. Choose the vein crossing at their shared edge before fine-tuning either face. Avoid mirror-flipping an island simply to make a vein meet unless the intended assembly actually calls for that relationship; also recheck normal-map shading after any mirrored mapping.
Keep the PBR maps registered
Connect the material using the Blender PBR texture setup workflow. Use the same intended UV map and coordinate transformation for the matching image channels. If you move only the color image, its veins can separate from associated roughness and surface detail.
Inspect the supplied files rather than assuming every material includes every possible channel. Treat roughness and other scalar data as data, and route a tangent-space normal image through a Normal Map node with the appropriate color-space interpretation. Blender’s Normal Map reference specifies matching UV coordinates and Non-Color image interpretation for that setup.
Begin without height-based displacement. First approve the silhouette, mapping and ordinary surface response. Only add a height effect if a suitable source is supplied and the intended finish calls for it; a polished slab should not become visibly rocky because a height control was increased to make detail easier to see.
Approve the counter in three views
| Review view | Inspect | Correct before approval |
|---|---|---|
| Main interior camera | Pattern hierarchy and repeated marks | Distracting veins or grain at the wrong scale |
| Close front corner | Edge profile and continuity | Stretched bevels, sudden restarts or shading seams |
| Low grazing view | Reflection and contact with the cabinet | Floating edges or an inconsistent surface response |
Render at the intended output size before increasing texture resolution or bevel segments. Preserve one labeled comparison showing the chosen coverage, edge treatment and lighting. This makes a later material swap much easier to judge.
If the counter will move into a game engine, keep the approved mesh, UVs and reference views together. The stone PBR validation checklist for Blender, Unity and Unreal continues the process through import settings and shader interpretation, so you can distinguish an export problem from a deliberate change in lighting.