Choose an outdoor HDRI by sun direction, sky coverage and the surroundings it will reflect. A landscape that looks attractive in a preview can still hide your product’s shape. Start with the lighting problem: a readable silhouette, a useful reflection or a particular time-of-day mood. Then compare a small number of environments under consistent scene settings.
This guide helps you choose between open fields, snowy landscapes and low-sun environments. It is a selection workflow rather than a promise that one map will suit every renderer or material. If you need the node connections first, use the Blender HDRI lighting setup guide.
Define what the light needs to show
Write down the feature that should be obvious in the finished image. A curved metal housing needs a reflection that describes its curvature. A fabric backpack needs enough light across seams and folds. A vehicle presentation needs separation between the body, wheels and ground. These are different jobs, even when all three are outdoor scenes.
Keep the intended display size in mind. A tiny rim highlight may be beautiful in a large render and disappear in a marketplace thumbnail. Equally, dramatic shadows may make a simple product harder to recognize. Decide whether the image primarily documents an object or communicates a mood before selecting the environment.
Build a short list with one neutral-looking daylight candidate and one more expressive candidate. A third is useful only if it introduces a meaningful difference, such as surrounding trees instead of an unobstructed horizon. Ten near-identical skies create work without necessarily improving the decision.
Read the sun and sky separately
The sun position establishes an important light direction; the surrounding sky contributes illumination from a much wider area. A low sun can create a long cast shadow on flat ground. A higher sun gives a different balance between upper surfaces and vertical faces. Neither is automatically better: the useful direction depends on the shape and camera.
Clouds require a closer look. A partly cloudy sky with a visible sun is not the same lighting condition as an overcast sky. Large white clouds can introduce broad bright shapes into reflections while a direct sun still produces a distinct shadow. Do not classify every image containing clouds as soft light.
Use the HDRI collection to combine Environment, Lighting and Scene filters. Sunny and Cloudy can describe the same panorama when direct sunlight and substantial clouds are both present. Sunrise and Sunset are separate choices for time-of-day atmosphere. Scene labels describe the surroundings, such as Rural & Fields or Snow & Ice; they do not measure brightness.
Compare open horizons with enclosed surroundings
An open field places much of the visual structure near the horizon. A canyon introduces taller dark and bright shapes around the subject. These differences are particularly noticeable on glossy surfaces, where the environment becomes part of the object’s appearance.
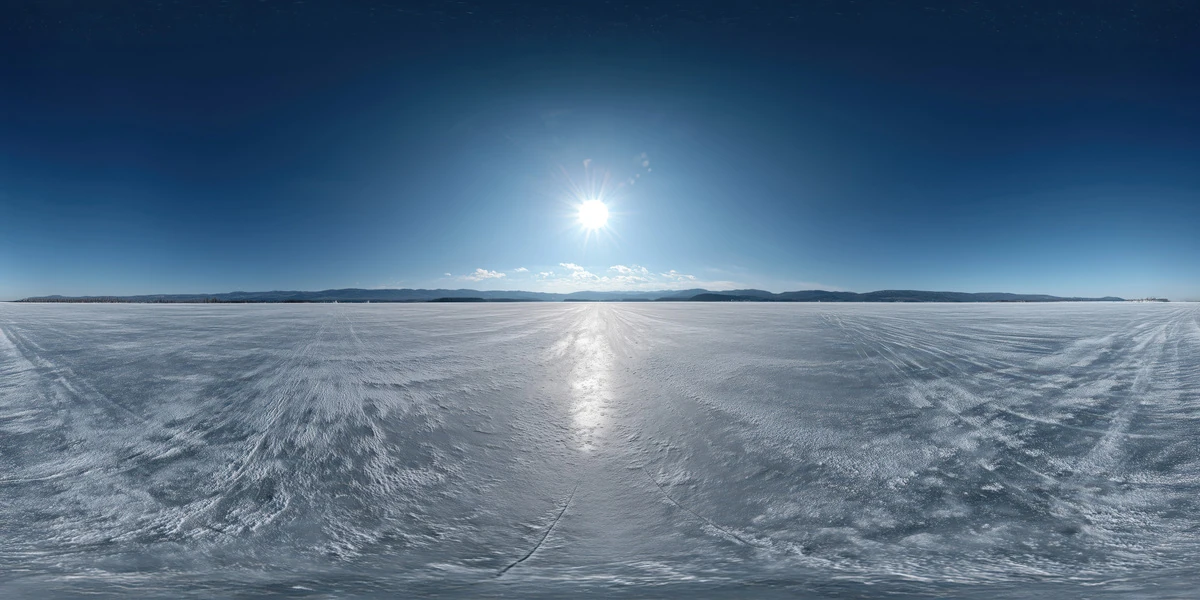
The Frozen Lake Midday Sun HDRI offers a broad icy foreground and a relatively low horizon. The Snowy Canyon Desert HDRI surrounds the viewpoint with rock formations. Use them as an exercise in reflection placement: hold the same object and camera, rotate each map, and observe which environment makes the object’s outline easiest to read.
This is also why changing material roughness should not be the first response to an awkward reflection. You may be seeing a cliff or a tree in an inconvenient location. The roughness map guide helps separate surface finish from the shapes supplied by the environment.
Use warm light deliberately
A low warm sun can support an outdoor story, but its color influences the object. A white plastic part may look golden on one side and cool on the other. That can be appropriate for the scene while being unsuitable as the only image used to communicate the product’s actual color.
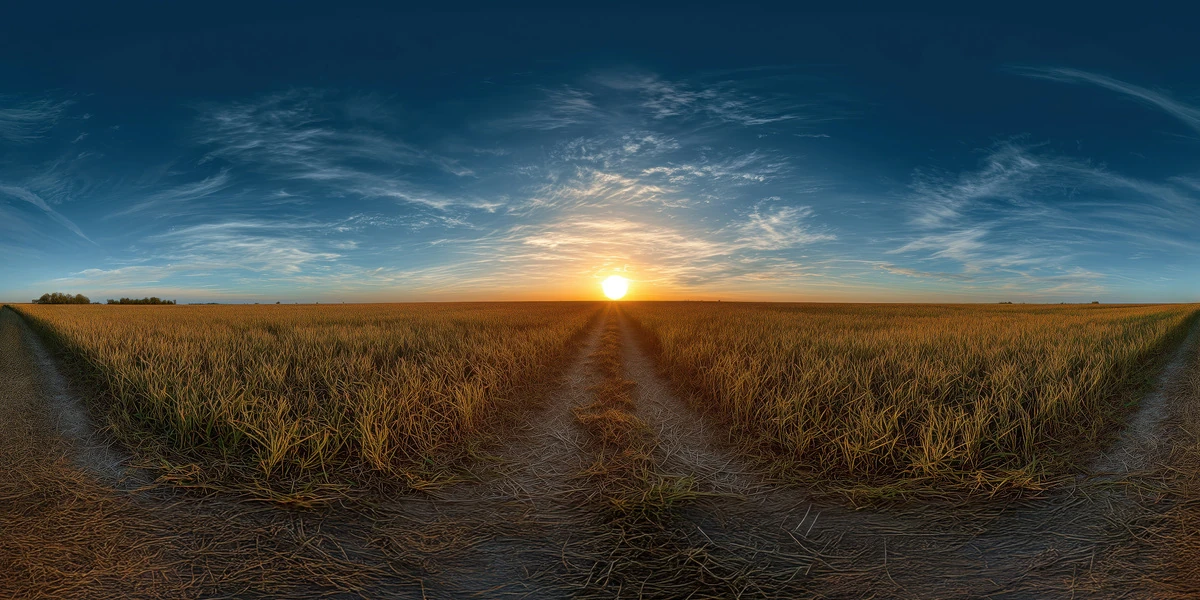
Try the Golden Wheat Field Sunset HDRI when the intended presentation benefits from a warm rural horizon. For a colder setting with a warm low sun, compare the Snowy Mountain Sunrise HDRI — Snowfields. These comparisons concern appearance and composition; they are not measured color-temperature matches.
For a product listing, keep a neutral reference render alongside the mood image. Avoid repainting a correct base color merely because the sunset environment warms it. Make a lighting decision and a material decision separately, then review how they work together.
Run a controlled comparison in Blender
Use one camera, a fixed subject and a simple ground plane. Temporarily disable other lights so the environment’s contribution is easy to understand. Add a matte gray sphere and a smooth reflective sphere beside the subject if you need quick reference shapes.
Blender’s World Environment documentation describes image-based world lighting. Load the actual HDR environment through an Environment Texture, using the projection appropriate to the file. The web preview is useful for choosing a candidate, but it does not replace the downloadable lighting data.
- Record the environment filename, rotation, World Strength and exposure.
- Render a small preview without changing the camera or material.
- Rotate the environment through a few clearly different directions.
- Keep the orientation that best explains the important feature.
- Repeat with the second environment using the same initial settings.
- If one map needs a brightness adjustment, record that adjustment before comparing the final pair.
There is no universal World Strength that makes all HDRIs equivalent. Treat the initial setting as a repeatable starting point, then judge the result. A fair comparison makes adjustments visible instead of hiding them inside an undocumented setup.
Judge three things before choosing
| Question | Look at | If the result is weak |
|---|---|---|
| Can I read the silhouette? | Edges against the background | Try another orientation or a less busy visible background. |
| Does the light describe the form? | Gradients across large surfaces | Change direction before increasing brightness everywhere. |
| Are materials distinguishable? | Reflection width, color and detail | Check the reflected surroundings and material setup separately. |
Do a second review at final display size. An environment that wins a close-up comparison may lose when the object occupies only a small part of the frame. Save the comparison images with their settings so that a later revision can be evaluated against the same baseline.
Separate the lighting choice from the background choice
A panorama can be valuable for illumination even when its visible ground is unsuitable for the shot. Nearby image details cannot provide the same interaction as modeled scenery. For close foreground contact or a moving camera, use the HDRI ground-plane workflow to plan what belongs in geometry.
Finally, choose resolution after choosing the environment. The 2K to 12K HDRI resolution guide explains how to test whether additional pixels improve your actual output. Keep the map that serves the subject, preserve its settings, and move on to refining the scene rather than continually replacing its lighting.