
A server room HDRI can give a Blender product render a useful mix of ceiling highlights, dark rack reflections and small color accents. The key is to choose those reflected shapes deliberately: a detailed environment can describe a metal housing beautifully, but it can also bury a logo under visual noise.
This guide builds a repeatable lighting study for a technology product, mechanical prop or sci-fi asset in Cycles. You will compare three indoor environments, position their reflections, separate lighting from exposure and decide when a local light earns its place. Use a model you already have; a beveled box with a recessed panel is enough to practice.
The examples use three free environments from our 24 Unclipped Server Room HDRIs bundle. The workflow also works with other equirectangular HDR lighting maps. The images below are browsing previews; load the actual HDR file from each download for illumination.
Why server room HDRIs work for technology products#
Reflective objects show their surroundings. Repeated ceiling fixtures can trace a curved enclosure; dark cabinets can separate a bright edge from a broad highlight. A cable aisle introduces colored shapes that may suit a network device or futuristic prop. These are useful visual ingredients, not automatic improvements to every material.
Choose the job before choosing the panorama. A catalog image needs legible form, controls and branding. A mood image can tolerate more color and complexity. For accurate material judgments, keep a neutral reference render alongside the stylized version. A blue reflection should not persuade you to change a physically neutral metal’s base color.
If the model itself needs preparation, the Boolean, Mirror and kitbashing guide covers mechanical forms and readable bevels. Lighting can reveal an edge that exists; it cannot supply missing geometry.
Choose one of three free lighting studies#
Each free ZIP contains one 4K (4096 × 2048) HDR map, a README and a CC BY 4.0 license. Credit 3dskillup.art as described on the download page. Choose a starting environment by the reflection structure visible in its preview, then judge its actual brightness inside Blender.
| HDRI | A useful first test | Watch for |
|---|---|---|
| Color-Coded Network Cabling Aisle | Colored accents on black plastic or polished hardware | Cable patterns crossing labels or confusing material color |
| High-Key White Server Hall | Broad bright reflections on a clean product silhouette | White surfaces merging together and losing edge contrast |
| Secure Mesh-Caged Data Center | Alternating dark and bright structure on metal panels | Dense grid patterns hiding small details |
Color-Coded Network Cabling Aisle#
Yellow trays, blue and purple cables, dark racks and overhead fixtures provide a busy technical environment. Use it when a small colored reflection supports the design. Start by rotating the brightest cable region away from any screen or printed label; let the accent describe a side panel instead.
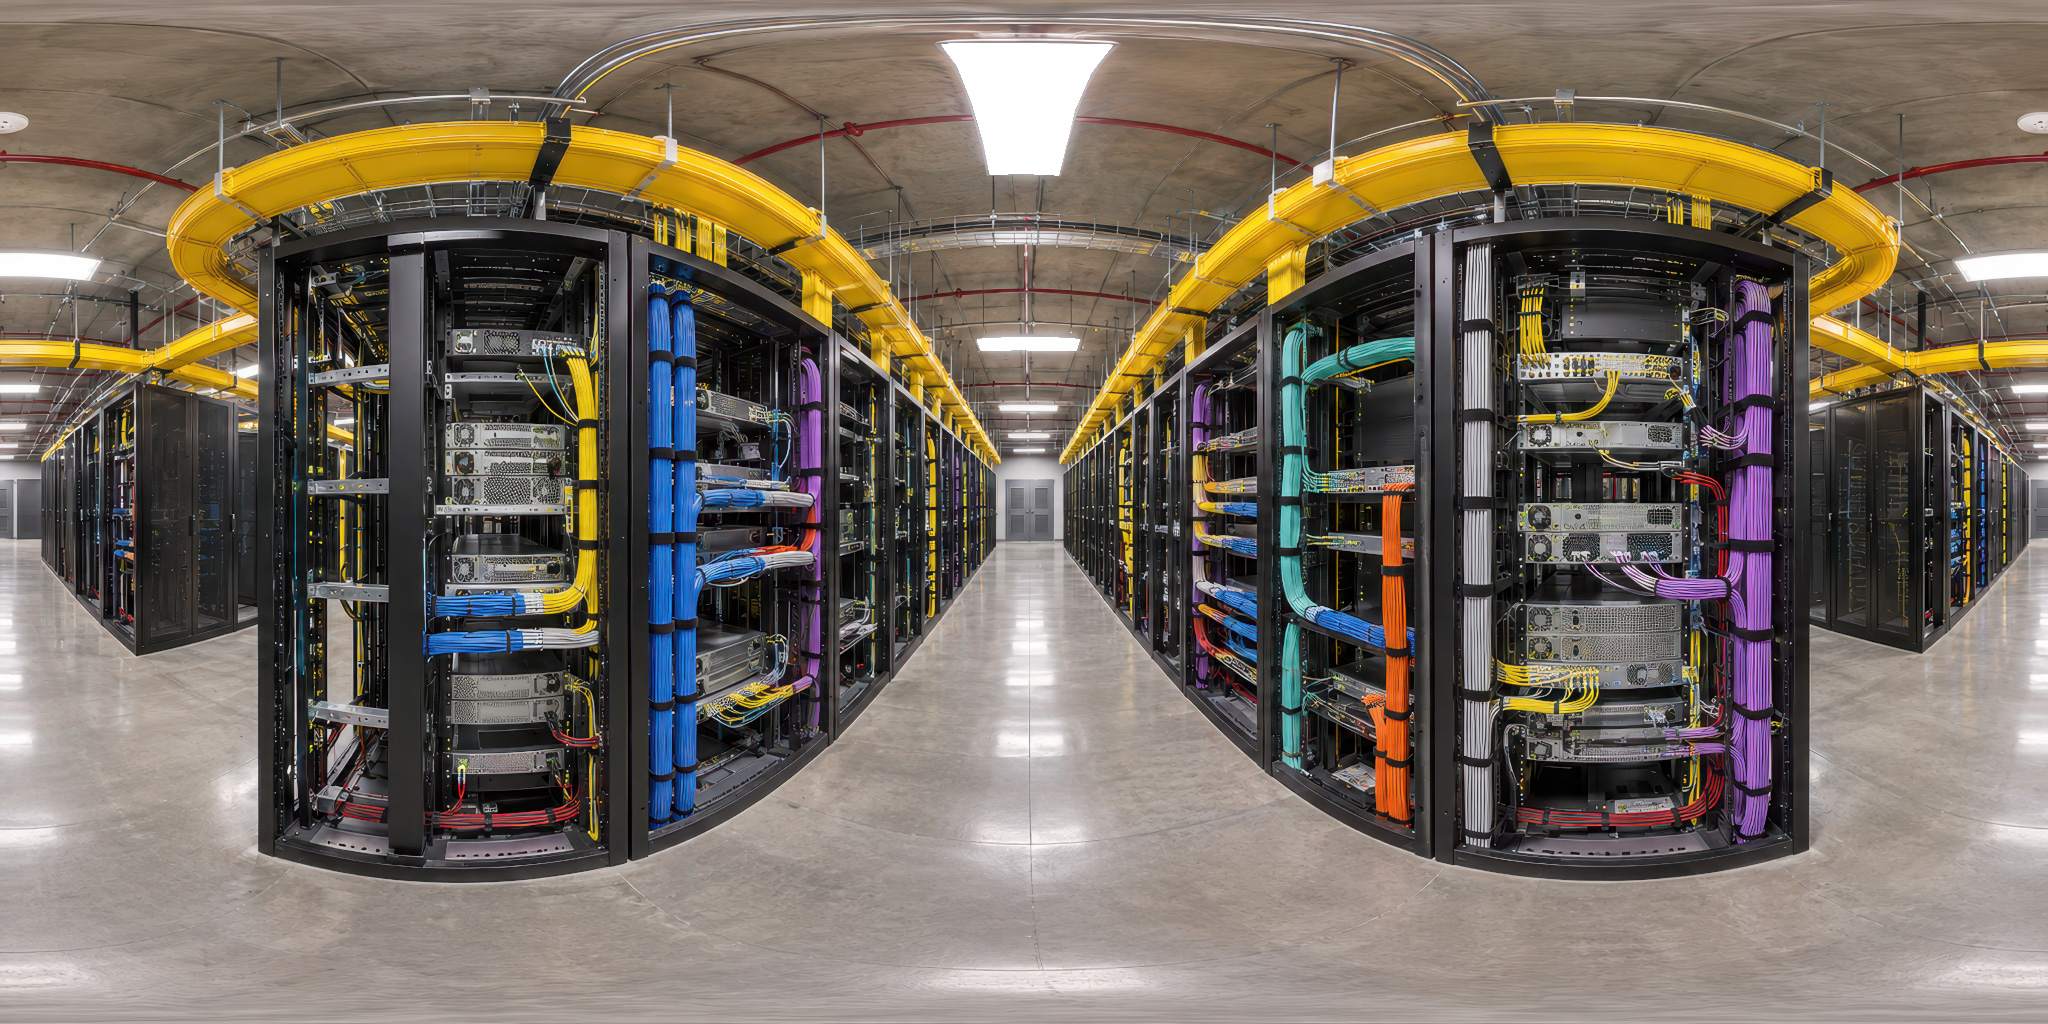
Download the free Color-Coded Network Cabling Aisle HDRI and compare a glossy curved surface with a rougher plastic panel. The two materials should respond differently to the same surrounding detail.
High-Key White Server Hall#
The white hall is a useful candidate for bright technical presentation. Its large pale surfaces can produce broad reflections, while rack openings and seams introduce darker structure. On a white product, look for a dark reflected strip along the silhouette before increasing exposure.
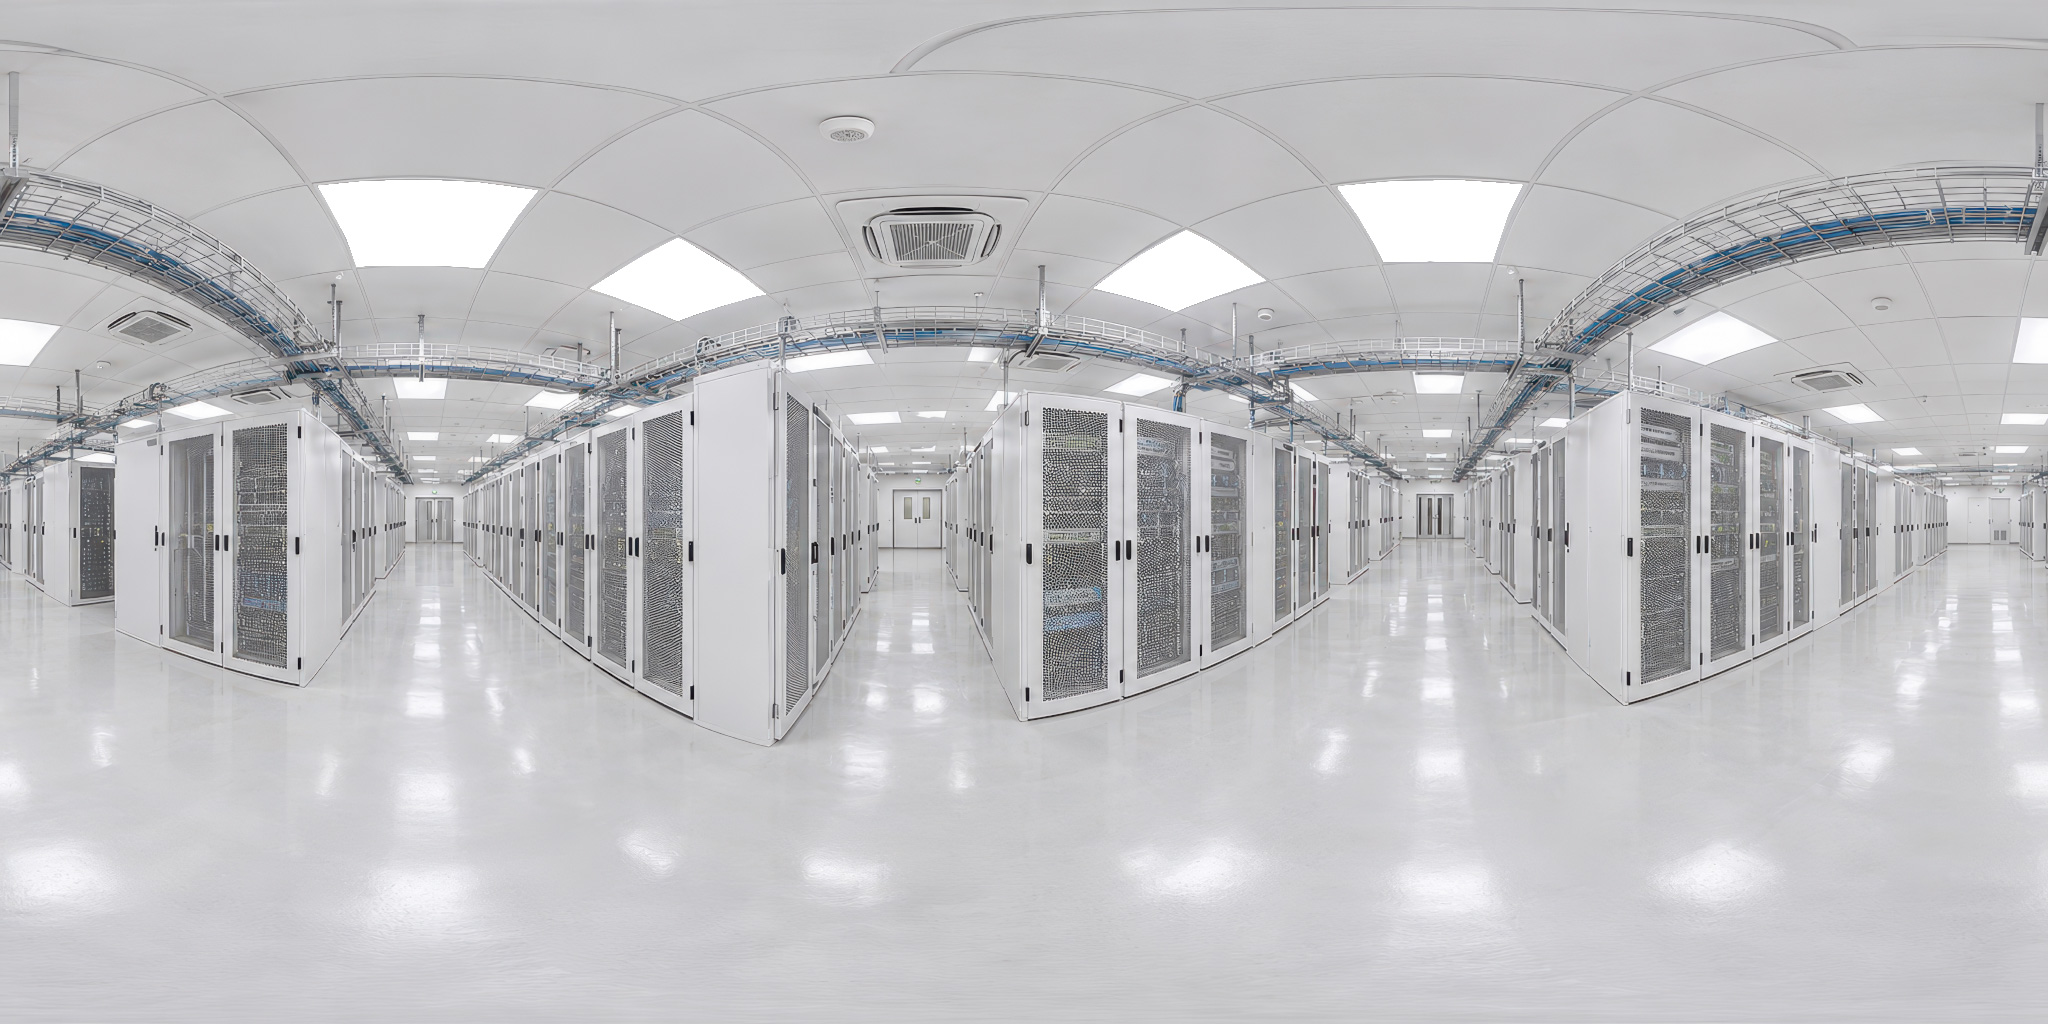
Try the free High-Key White Server Hall HDRI. Judge a full render and a thumbnail: subtle edges that look adequate at 100% may disappear at catalog size.
Secure Mesh-Caged Data Center#
Dark mesh cages create a different pattern around the bright overhead lighting. This is a useful contrast study for a brushed-metal enclosure or an industrial prop. If the cage pattern makes a smooth surface look scratched, rotate the environment before changing the material.
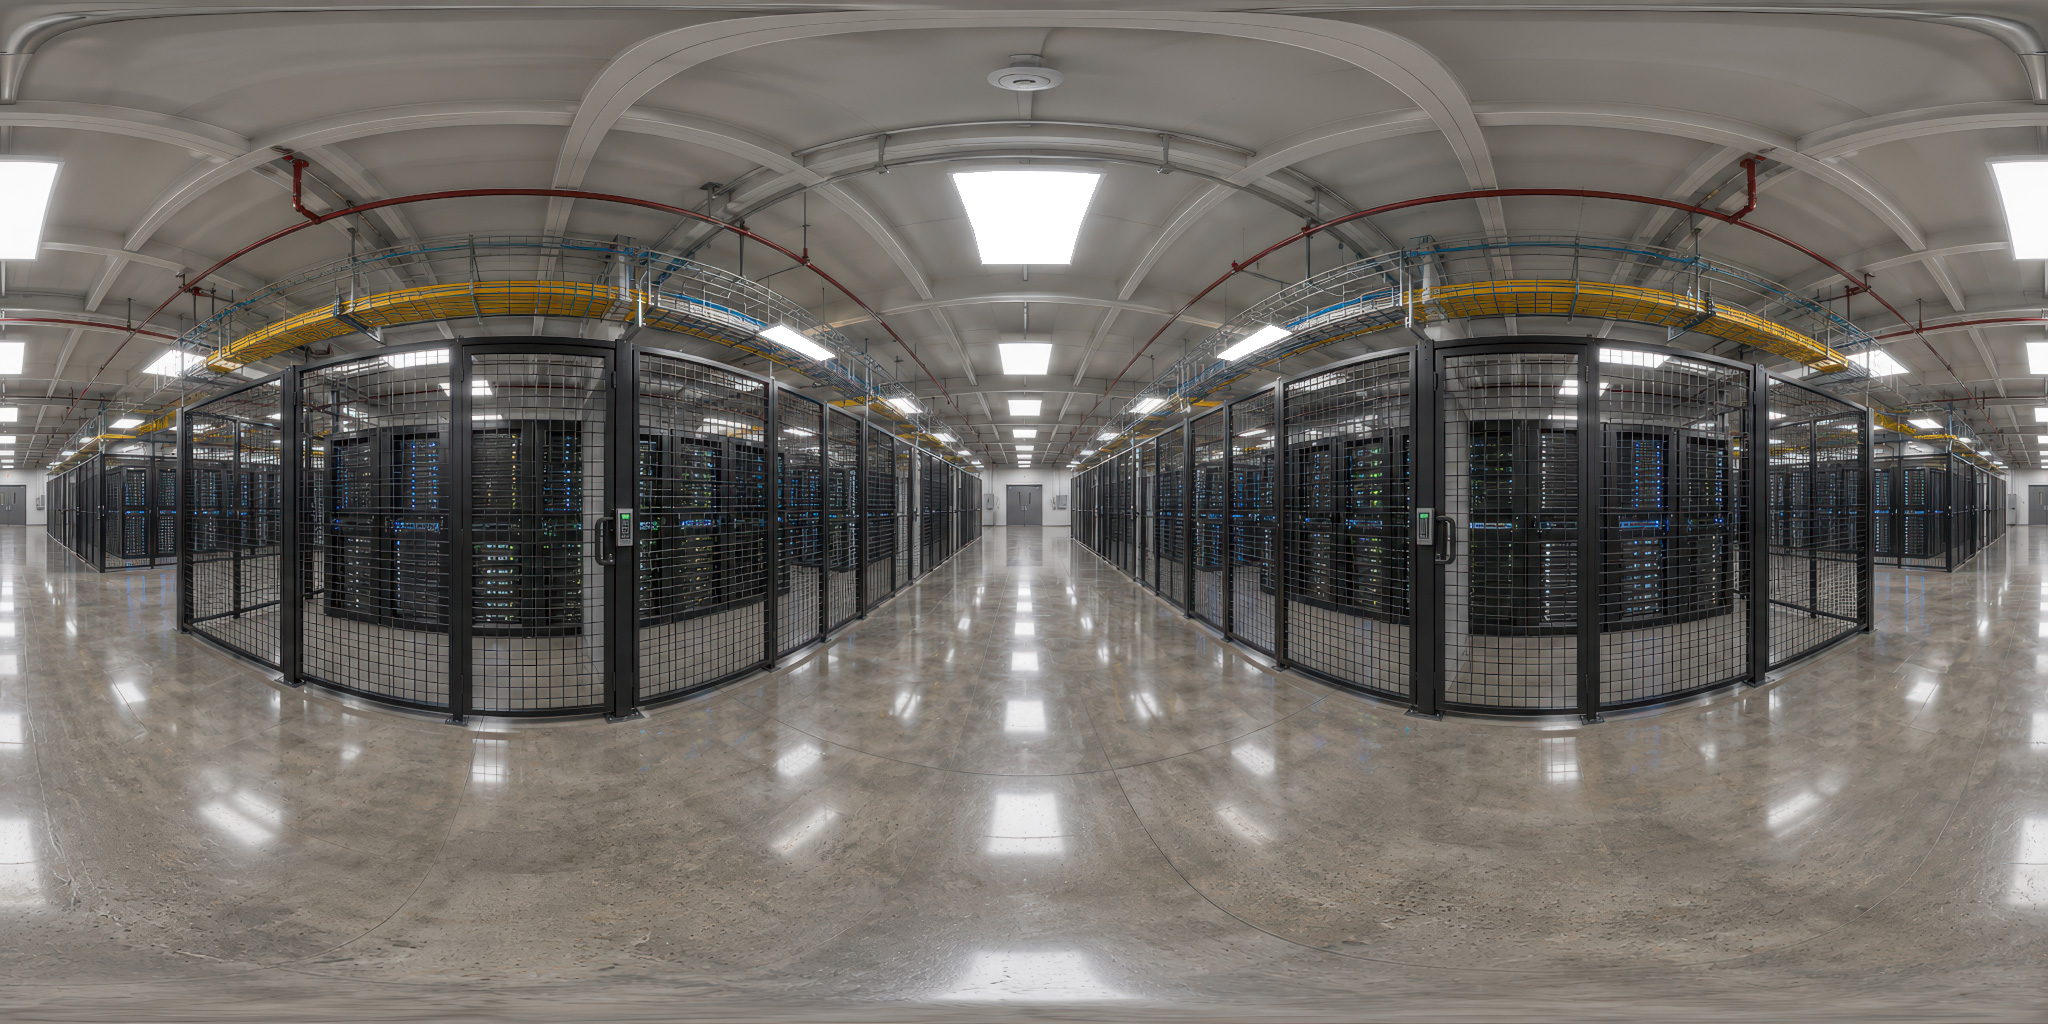
Use the free Secure Mesh-Caged Data Center HDRI to test whether structured reflections explain the shape or compete with it. For a tiny portfolio thumbnail, a quieter orientation often reads better.
Set up a controlled Blender scene#
Use the same scene for all three environments. Place the product on a real ground plane, fix the camera, and disable additional lights for the first comparison. Add a neutral matte sphere and a smooth metallic sphere off to the side as diagnostic objects. Hide them for the final composition.
Check scale, bevels and normals before lighting. A razor-sharp box offers almost no rounded edge to catch a highlight. Conversely, a very large bevel can make a machined component look soft. Use the intended final viewing distance to decide what is appropriate.
Start with simple, plausible materials and keep them fixed. If you are uncertain about texture inputs, follow the PBR texture setup workflow. This prevents a wrong roughness map or normal connection from being mistaken for an environment-lighting problem.
Choose one display transform, such as AgX, and keep its Look and Exposure unchanged during the initial comparison. This is a controlled experiment, not a claim that identical slider settings make different HDRIs equally bright.
Load and rotate the HDRI in the World shader#
The following setup uses Blender’s World shader and Cycles. Menu placement can vary by version; the node names are the useful reference.
- Extract the chosen free ZIP and locate its HDR environment file. Do not use the JPG or WebP preview as the lighting source.
- In the Shader Editor, switch from Object to World and enable nodes.
- Add an Environment Texture node, open the HDR file and choose Equirectangular projection.
- Connect Environment Texture Color → Background Color, then Background → World Output Surface. Start with Background Strength at 1 as a comparison baseline, not a prescribed final intensity.
- Switch to Rendered viewport shading. If you compare through Material Preview, enable Scene World so you are not evaluating Blender’s separate preview environment.
- Add Texture Coordinate and Mapping nodes. Connect Generated → Mapping Vector → Environment Texture Vector. Keep Mapping scale at 1, location at zero, and begin with zero rotation.
- Adjust Z rotation to move the environment around the product. Leave X and Y alone unless you intentionally want to tilt the horizon.
The general HDRI setup guide expands on the node connections and baseline scene. Blender’s Environment Texture documentation explains why this node is appropriate for an environment map.
Find the reflection before adjusting brightness#
Make four small test renders at Z rotations of 0°, 90°, 180° and 270°. These are sampling positions, not recommended final angles. Choose the most readable result, then refine the angle in smaller steps around it.
Inspect three areas separately: the silhouette, the broad front surface and one recessed detail. A ceiling strip might explain the curved top while leaving the front panel flat. Decide which area matters most to the camera rather than trying to make every surface equally bright.
For metal, look for a clear transition from bright to dark across the form. For black plastic, preserve a highlight that explains curvature without turning the whole housing gray. For white plastic, seek enough contrast to distinguish adjacent planes. The metal lighting guide develops this reflection-first approach in more detail.
If a reflection looks too busy, try another orientation or another environment. Raising roughness solely to erase an inconvenient reflection changes the represented material. Adjust roughness when the surface itself needs correction, then check it under the neutral reference as well.
Balance environment strength and exposure separately#
World Strength changes the environment’s contribution to the scene. Color-management Exposure changes how the rendered values are presented, including contributions from any other lights. Once you add a lamp, these controls no longer solve the same problem.
First choose a useful environment orientation. Then set its contribution so the important surfaces have readable light and shade. Adjust overall exposure to present that result, keeping the view transform fixed. Save the values with the test render so you can reproduce the comparison.
If you compare environments of different brightness, use the matte sphere as a rough visual reference and record any strength adjustment. Do not call this photometric calibration. The bundle is a creative lighting library, not a measured record of a particular facility’s illuminance.
In Blender’s color-management reference, Exposure is expressed in stops: adding one stop doubles the values before the display conversion. It does not move a highlight or repair an unhelpful reflection pattern.
Add one local light only when it has a clear job#
After the environment-only pass, identify one unresolved problem. A screen may need a gentle highlight, a connector may disappear into a recess, or a front label may need separation from the housing. Add an area light to address that feature and compare the result with the baseline.
Move and resize the light before increasing its power. On a reflective product, its shape and location can matter more than its brightness. Check that the new highlight does not erase the material texture or create a second competing focal point.
Use the HDRI versus area lights guide to decide how the two sources should share the work. If you place the product inside a fully modeled, enclosed room, walls and a roof can block World illumination. Add appropriate interior lights rather than trying to force the environment through opaque geometry.
Understand what an unclipped HDRI can and cannot do#
An HDR environment can store brightness relationships beyond the range shown by an ordinary preview image. “Unclipped” describes the intended preservation of bright source values; it does not guarantee a specific number of stops, a perfect shadow, or correct exposure in every scene. A white ceiling lamp in the preview tells you little about its numeric intensity in the HDR file.
Resolution is a separate question. Start with a smaller supplied map during setup, then compare a higher-resolution version if smooth reflections reveal insufficient detail. The full bundle supplies 2K, 4K and 10K options. The three free downloads featured here each contain a 4K map; the other resolution options belong to the premium pack. The HDRI resolution guide explains how to compare spatial detail at the actual delivery size.
A World environment is treated as infinitely distant. It supplies no rack geometry, nearby collision surface or physical floor. Translating the camera will not create the parallax of a modeled server aisle. Follow the ground-plane workflow for contact shadows, and separate the HDRI from the camera background when you need a clean product backdrop while retaining useful reflections.
When a larger server room collection is useful#
Once the three free studies reveal the kind of reflection you need, a larger library helps you explore variations without rebuilding the product scene. Our 24 Unclipped Server Room HDRIs collection includes bright halls, darker equipment corridors, warm utility spaces and colored technical environments.
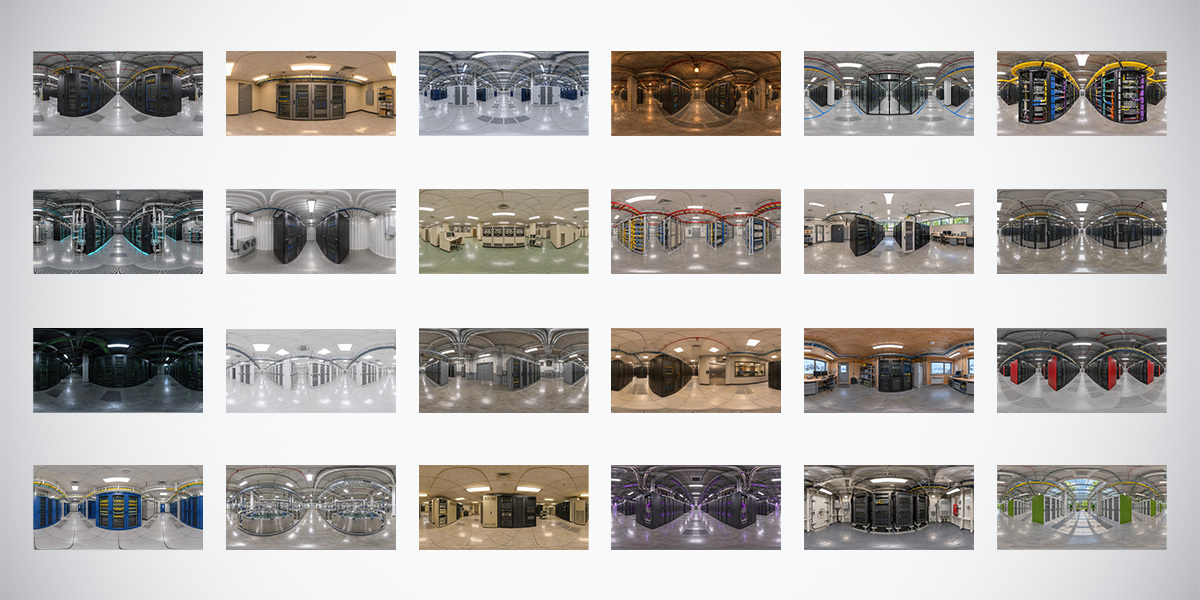
The premium pack contains 24 equirectangular environments in 32-bit HDR format, each at 10K, 4K and 2K. These are image assets for lighting and reflections, not server models or preconfigured Blender scenes. The environments are AI-assisted and manually refined. Use them primarily for illumination and reflected surroundings; inspect visible architectural details carefully if the panorama will occupy the background of the final image.
You do not need the full collection to complete this exercise. Expand when you have a concrete need—such as a quieter white hall, a warmer industrial mood or a different arrangement of overhead highlights—and compare the marketplace’s current package and license details before buying.
A short comparison exercise you can reuse#
Render the same product under all three free environments. For each one, save the best rotation, World Strength, Exposure, map filename and resolution. Make a second comparison only after you have decided whether a local light is necessary.
Use these questions to select the final setup:
- Can you identify the product’s silhouette at thumbnail size?
- Are the main controls, label and recessed detail readable?
- Do metal, plastic and glass retain distinct responses?
- Does the environment support the intended color palette?
- Are contact shadows convincing on real geometry?
- Does the preferred result still work from a second camera angle?
For animated presentations, extend the check around the full rotation using the product turntable lighting workflow. A reflection that works in one still can conceal a feature halfway through a turn.
Frequently asked questions#
Can I use the preview panorama to light the scene?#
Use the HDR environment from the download. The web preview helps you choose a composition but does not retain the same high-dynamic-range lighting information.
Why does my metal look dark under a bright server hall?#
It may reflect a dark region toward the camera. Rotate the World and inspect a metallic sphere before changing exposure or base color. Also check that the scene is actually using the World you edited.
Does the pack contain a complete 3D data center?#
No. It contains HDR environment images. Model or source nearby architecture separately when the shot needs parallax, physical occlusion or detailed background geometry.
Is 10K always better than 2K for lighting?#
No. Higher spatial resolution can help detailed reflections, but it does not automatically improve the lighting design. Compare the same map at final output size and choose the smallest version that meets the shot’s needs.